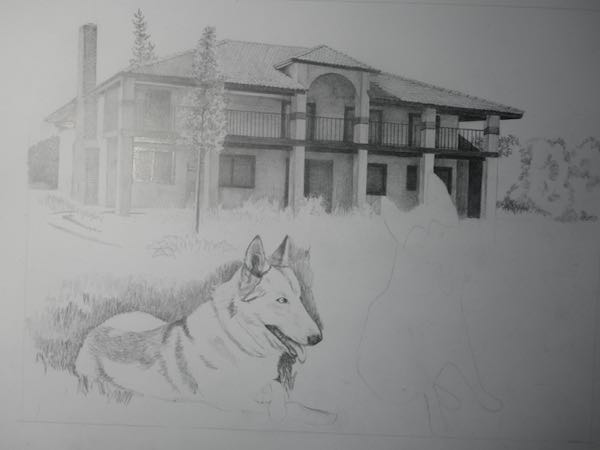
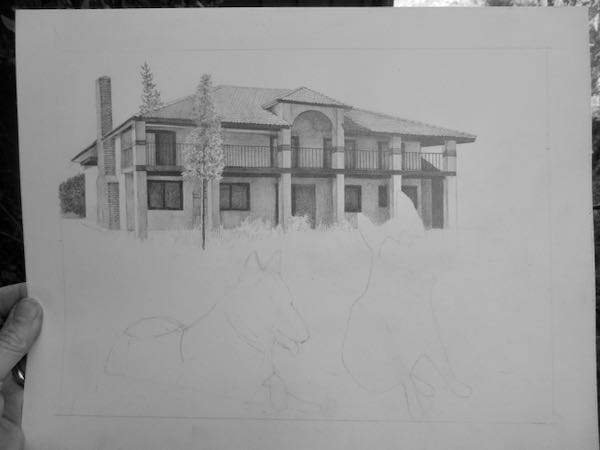
While I was waiting to hear if JM approved the house, I began one of the dogs. Just like on the itty-bitty-face drawing, I am leaving a gap between the different subjects to fill in later.
(This picture is overexposed on the left side of the house because my giant magnifying light is washing it out.)
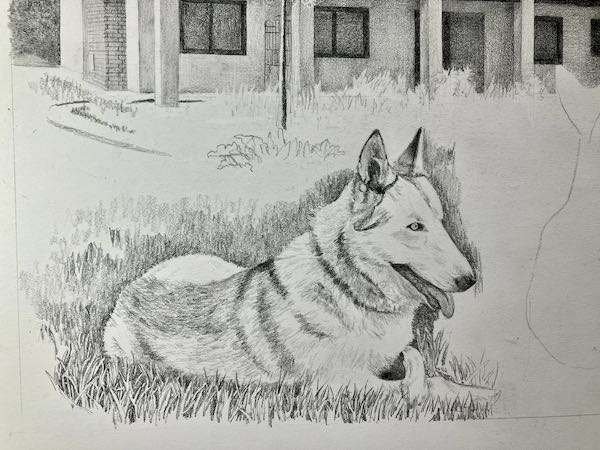
No emailed instructions arrived, but I had time to keep working on the drawing, so I kept going.
Finally, this was as far as I felt comfortable going without further input from JM.
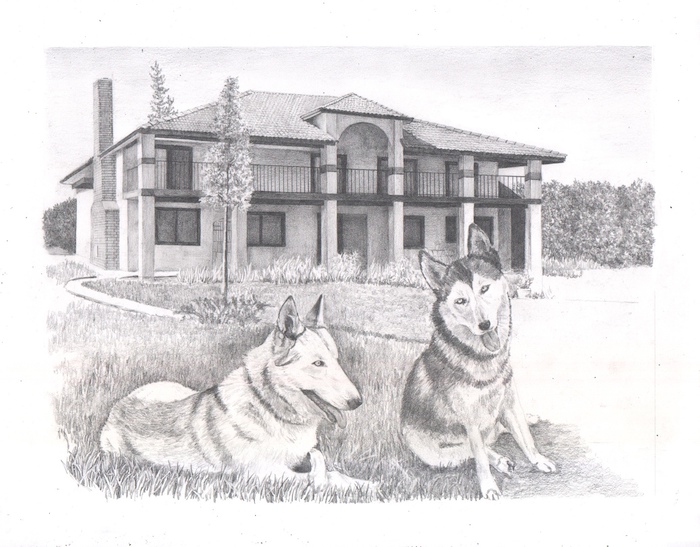
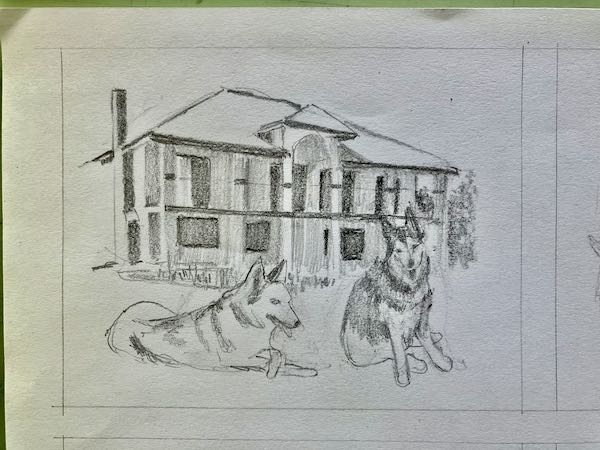
The dogs’ names were Timber and Tahoe, they were part wolf, and that’s all I know about them.
What a treat to be able to draw this, to pay off my old debt, to reconnect with my old friend, and to just use pencils, my favorite medium.
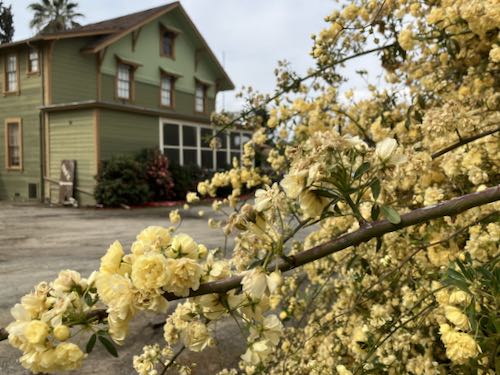
Many years ago, there was a fabulous little place in Lemon Cove called Foothill Fruit. The owner was a terrific baker and sandwich maker, and some mornings I woke up just ravenous for one of her scones and French Roast coffee. I worked there for a few brief months (it used to be necesary to get a second job during my slower winter months in order to pay my taxes—thank you, Sacramento). When I was no longer working there, we were on trade: Trail Guy (his name was Road Guy back then) and I ate, and I would eventually do a complicated collage drawing of her dogs and her home.
This is the only photo I can find from Lemon Cove right now. I didn’t want you to fall asleep with so many paragraphs of just words.
I used my film camera to take some photos, and then I did a few sketches. The owner, whom we will call JM, couldn’t make up her mind as to how she wanted her dogs and home depicted. Then, she moved far away.
This debt in the form of an undrawn picture bothered me quite a lot. She and I weren’t close friends, but we were on good terms and enjoyed each other’s company. I couldn’t figure out how to reach her (this was pre-internet), so I filed the notes and photos under “Incomplete Jobs” or some such thing.
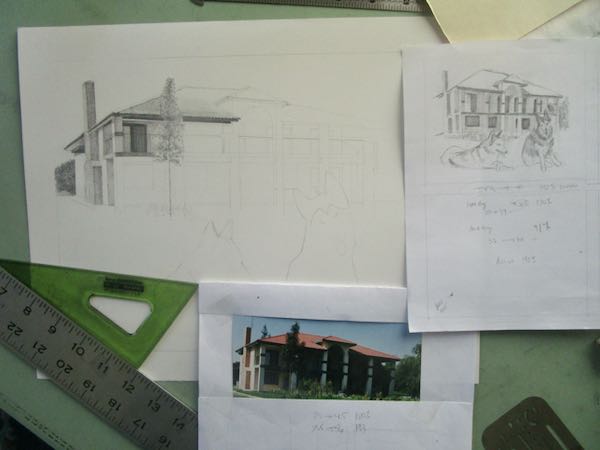
At an oil painting workshop in January of this year, one of the participants asked me if I knew JM. Well, saw off my legs and call me Shorty! The participant put me in touch with JM, I dug out the photos, we started emailing, and she approved this sketch.
You know I can draw so this doesn’t scare you, yes?
If I hadn’t just completed that commissioned pencil drawing with all those little bitty faces, this would have been very daunting. However, I was feeling ultra capable and competent at my craft. Cocky, perhaps? Nope, just confident. (Confidence is a smile; arrogance is a sneer.)
The house photo is very dark so there will be a bit of guesswork on the details. The fact that JM no longer resides in this house gives me a little extra freedom. Maybe.
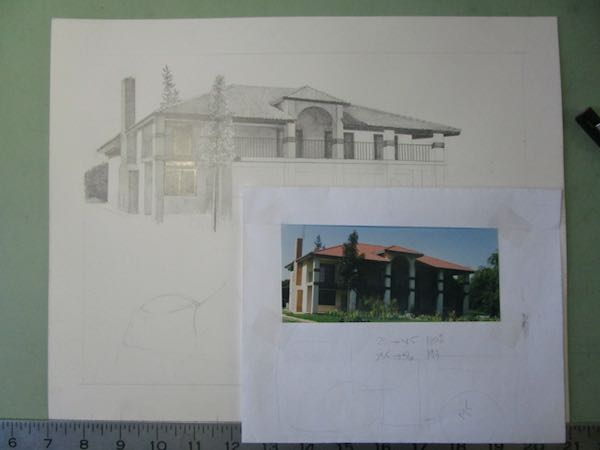
It is going very slowly. It’s been awhile since I drew such complicated architecture. Accuracy is important in rendering architecture, even if there is a bit of guesswork in the shadows.
I emailed this to JM to ask if there was anything that needed to be corrected. Stay tuned. . .
Here are a few thoughts about drawing with pencils. First, have you noticed that when galleries tell the medium used in making a piece of art, they say things like “oil”, “watercolor”, “acrylic”, or “pencil”? “Pencil”???? Isn’t that actually graphite? In a sense, calling a pencil drawing “pencil” is somewhat like calling a painting “brush”.
Never mind.
The drawing has been temporarily removed from the blog because it is going to be a surprise for some people.
When the customers retrieved their pencil drawing with all those little bitty faces, they wanted to know how in the world I was able to make those tiny visages legible.
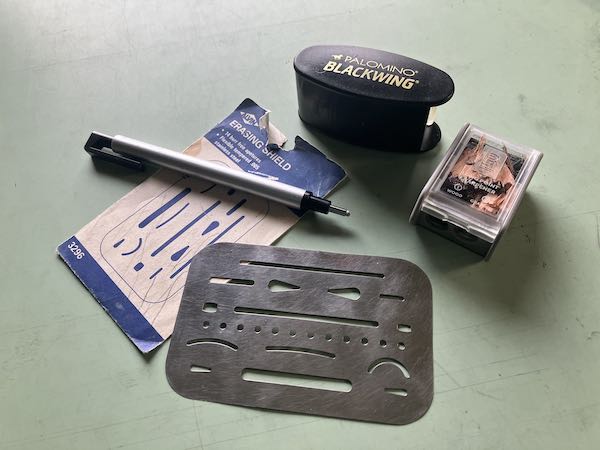
The way I got those tiny faces was with little itty bitty adjustments while working under a magnifying glass using these tools, working for many hours on nothing but those faces, refining with each pass, turning the photos and the drawing upside down in order to evaluate the shapes, the darkness, the blurry quality, and then mimic what I saw.
That teensy eraser came into being about 5 years ago. (Okay, if it feels like 5, it was probably 8 or 10 years ago.) How were we able to draw without such a tool?? There were other eraser sticks, but none so tiny. We relied on erasing shields to isolate small spaces, which were never small enough. Now, with the Tombow Mono Zero, we sometimes want an even smaller eraser.
Those sharpeners by Blackwing are designed to give a long point, using 2 different blades. First, use the hole on the left for a looonnnng lead (not actually lead—Pb—but graphite). The hole on the right makes an extremely sharp point, unless the blades have worn themselves dull, which mine have. I had to break out my new one, which I had been holding back on using because it cost $14!! For a pencil sharpener??
Since I no longer have one in reserve, it seemed prudent to buy another backup. Now they are $16 on Amazon. SIXTEEN DOLLARS FOR A PENCIL SHARPENER!
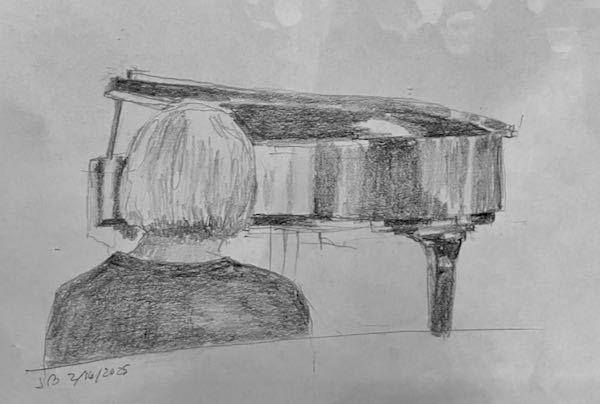
Sometimes it feels good to just sketch quickly, without anything other than a Blackwing pencil I usually keep with me, using any available blank piece of paper. It is a different kind of challenge, which is probably good practice.
Yeppers. Time to raise my prices.
P.S. SIXTEEN DOLLARS FOR A PENCIL SHARPENER?? I’m struggling with this concept, which you may have noticed.
For the first time in many years, I kept track of how long this took. Getting these little people to be themselves took a very very long time. (Don’t ask—not telling). It is probably (past) time to raise my prices.
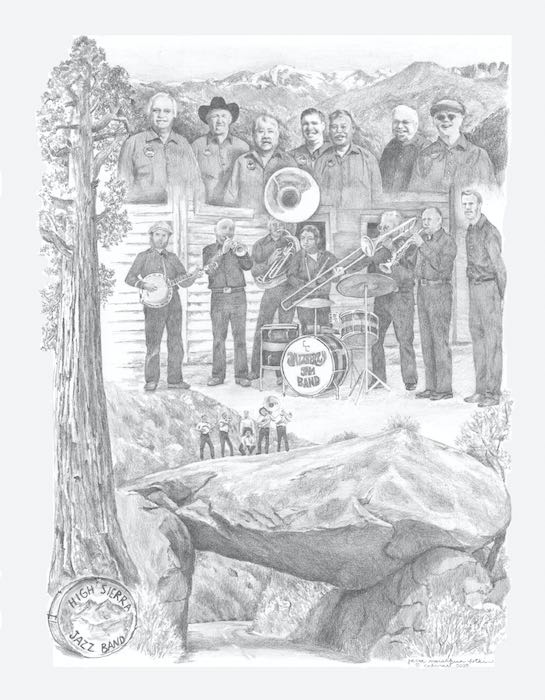
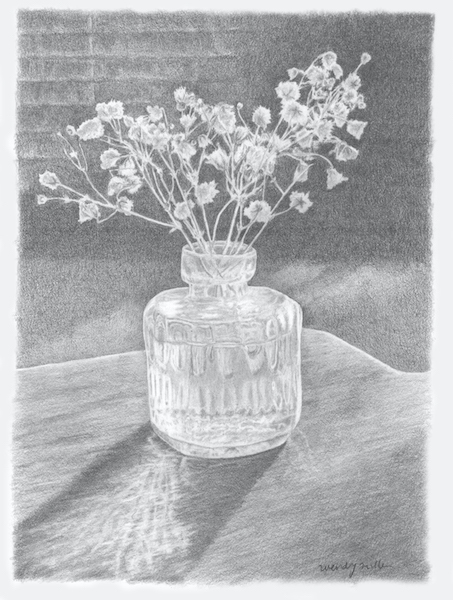
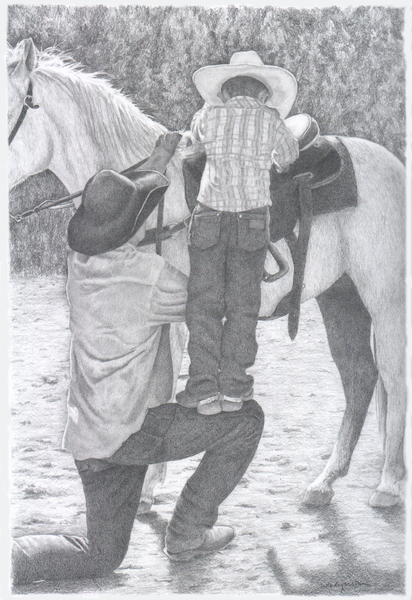
A long time drawing student who has become a friend hit a metaphorical speed-bump in life. Her body has betrayed her; one of the symptoms is weakness and a tremor in her dominant hand. We’re not going to talk about diagnosis or the emotional wallop, only about our time together drawing. She is without a doubt the best student I have ever had.
When she stopped coming to lessons, she had 2 drawings that were almost finished. People who don’t draw, or who don’t draw as well as she does, might have thought the drawings were finished.
She asked if I would finish the drawings for her. My first thought was that I would be happy to help her in any way, and of course I would finish the drawings. After thinking more, I proposed that we work on the drawings together. She could do the parts that she is able to do, and then she could tell me exactly what else she would like to be done.
It was just like drawing lessons, except this time she was doing the instructing, and I was following the instructions. After many years of drawing together, this went like clockwork; we were like a well-oiled machine.
Almost three hours flew by, and these two drawings are the result.
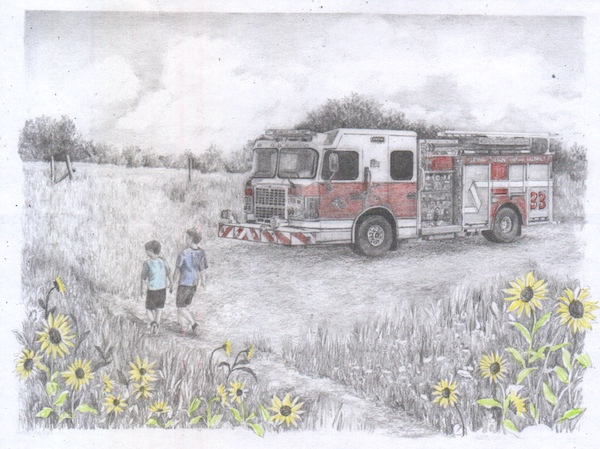
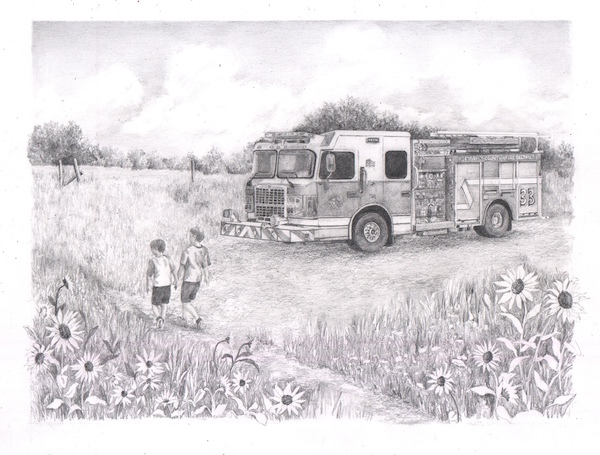
To show Friend/Customer how color will look on his drawing, I printed it on my unreliable printer and scribbled some color on the copy.
This passed muster (not sure about this term but it has military origins). So, I pulled out my good colored pencils (Polychromos by Faber Castell) and colored the original.
After I scanned it, I realized that I forgot to put color on 33, the number of the engine. So, now it has color there too.
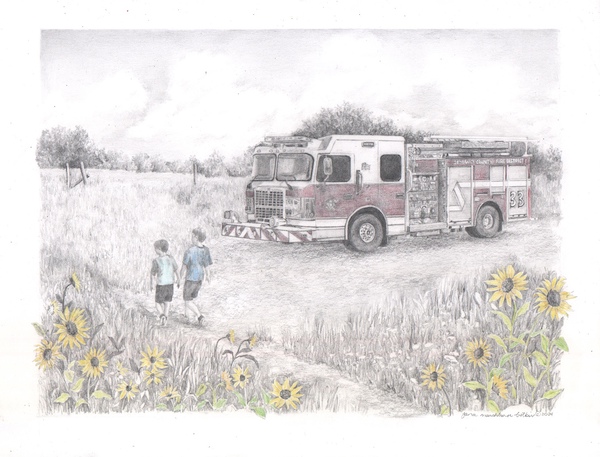
Phew. Finished this very challenging pencil commission in time for Friend/Customer to deliver it for Christmas.
My friend/customer likes to challenge me. He thinks I can do things with my pencils that I am never sure I have the ability to do. We talk, I sketch, we talk some more, I revise, we talk some more—and that’s all before I begin the drawing.
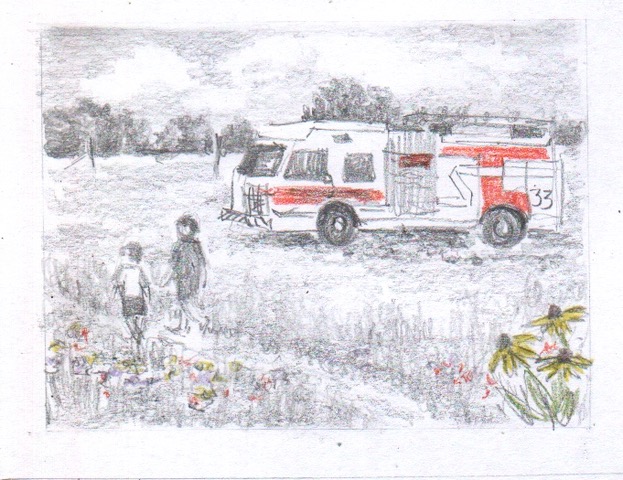
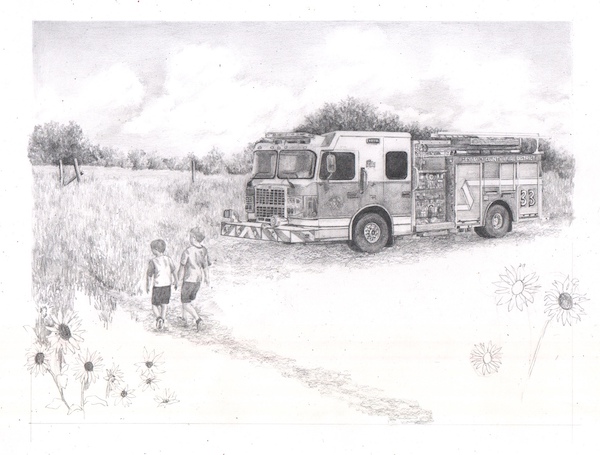
I’ve shown you some of this in progress, beginning with this messy sketch.
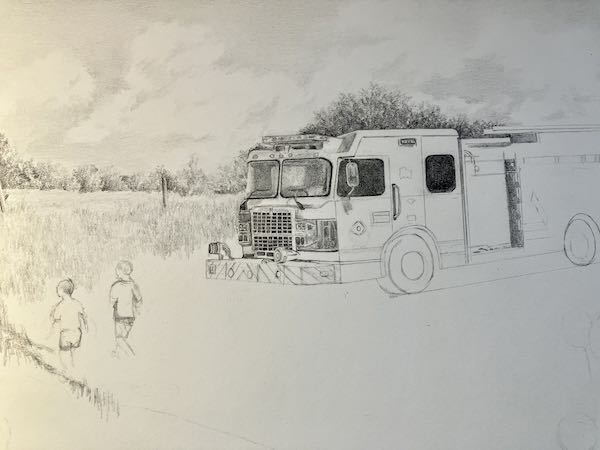
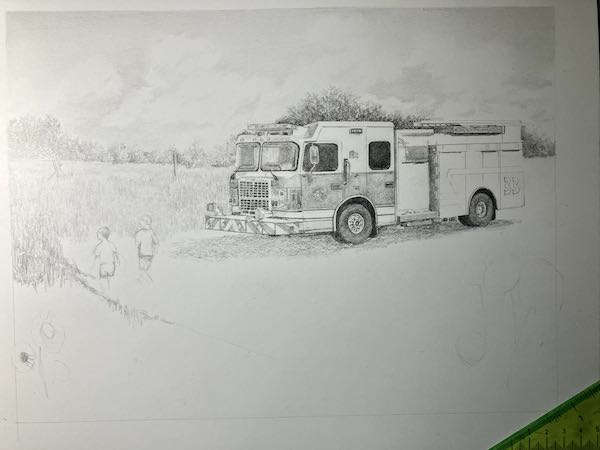
When the very complicated and unforgiving fire truck seemed to be the easiest part, I KNEW I was in for a challenging rest of the drawing.
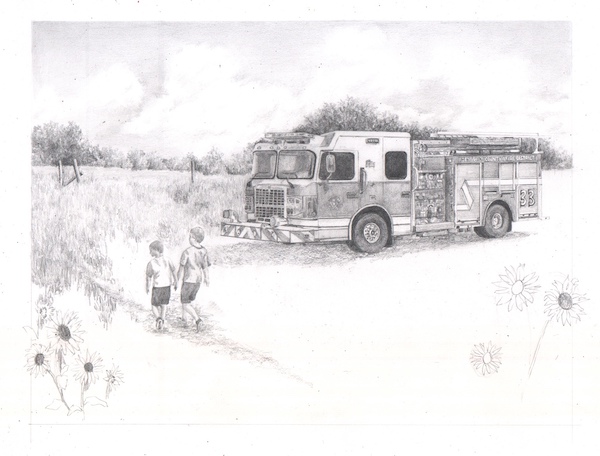
With time was running out, I set a deadline for finishing, and began on those little boys, working from almost impossible-to-follow photos.
After I had the boys drawn, I scanned it and sent it to Friend/Customer, who said the larger boy looked fine, but he didn’t like “the bend” of the smaller boy, whose head also looked too small.
I wanted to say, “Then why did you send me a photo with him bending?” Instead, I embiggened the little boy’s head and unbent him.
He said it looked good, then texted that Mrs. Customer thought the bigger boy’s cheek looked too chubby. How she could see this is a mystery to me. However, she knows the boys, and I trust her judgement.
The difference between a chubby cheek at this tiny scale is the width of one hair. THIS is the reason that one should never try to draw a face smaller than an egg, and I don’t mean a hummingbird egg. The boys were supposed to be drawn from the back, but the supplied photos show a tiny amount of faces. (Why am I unable to say, “NO, I CANNOT DO THIS!”?)
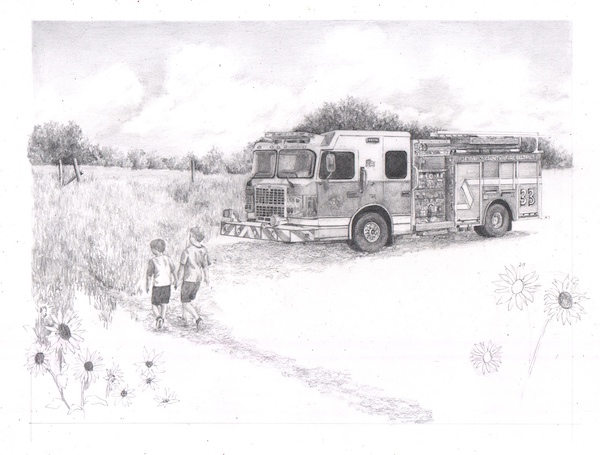
That tiny adjustment was accepted. Friend/Customer asked if I was going to put anything on the lower third of the drawing, and I replied, “Nah, I’m gonna quit and sign it now.” (Of course I was just kidding around, but wanted to poke at him for putting me through this stressful, make-it-up, mind-reading exercise.)
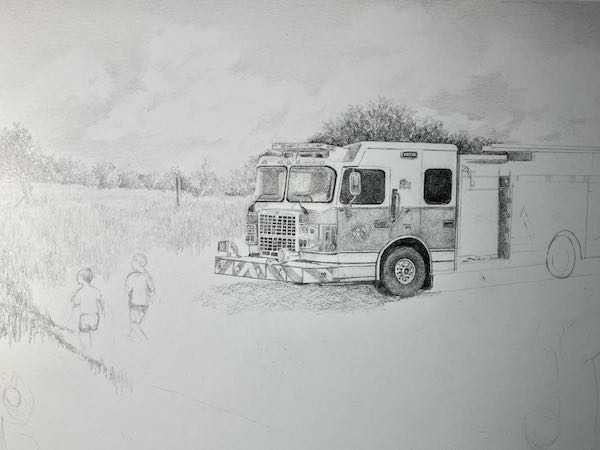
The grasses and wildflowers were also very challenging, because I had no photo for this completely fabricated scene. It was a large piece of real estate to cover with the tiny point of a pencil, but being the professional that I am, I soldiered on. When everything was planted and landscaped, I scanned the drawing yet again and sent it for approval.
The next plan is to print this out and experiment with color. I will put red on the firetruck, yellow on the sunflowers, and something on the boys’ tee shirts, most likely blue. Friend/Customer asked if I could do it on a copy first so that they can approve this non-erasable addition before it goes onto the original.
If the practice piece passes muster, I will add the colors. Then I might just go have a cigarette.* Stay tuned. . .
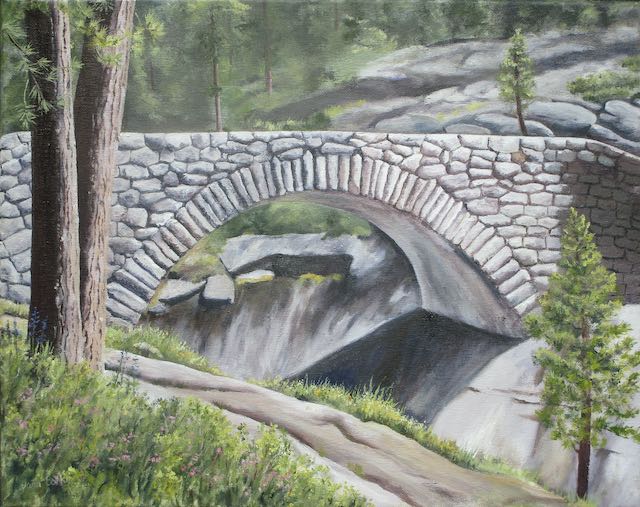
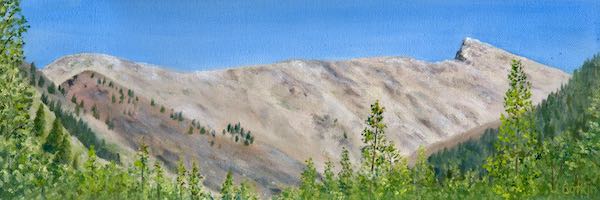
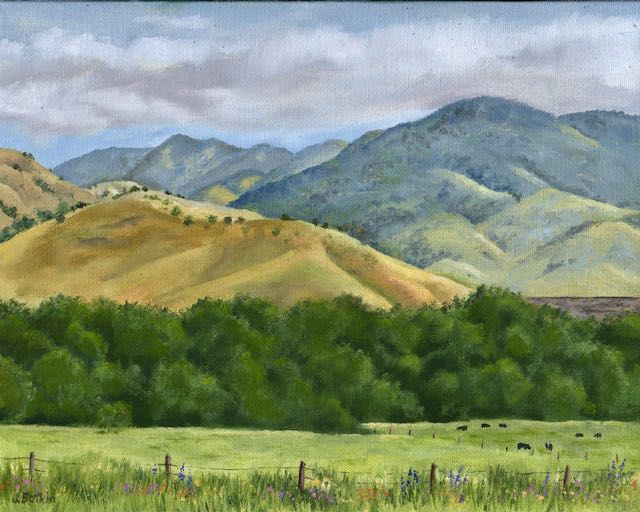
SIMPLY HOME
Sawtooth #58, 6×18″, $195
The show hangs until December 29. You can see the show at CACHE in Exeter, Friday, Saturday, and Sunday, because as you know, everything looks better in person. The hours are posted on CACHE’s website. (Scroll down to see the hours.)
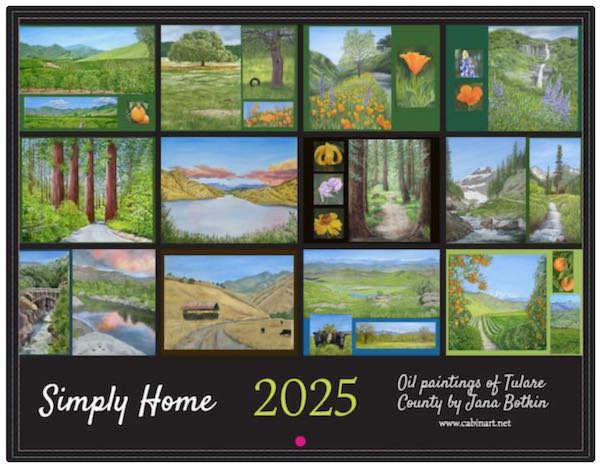
2025 CALENDARS AVAILABLE
Available here, $25 each, or at CACHE, or if you see me around with a handful in Fernando’s trunk.
*Take it easy. . . I’ve never smoked in my life and never will.
TODAY OUR POWER WILL BE OUT FOR THE BULK OF THE DAY, SO IF YOU ORDER A CALENDAR, EMAIL ME, OR COMMENT ON THIS POST, YOU WON’T BE GETTING A RESPONSE UNTIL THE EVENING OR TOMORROW.
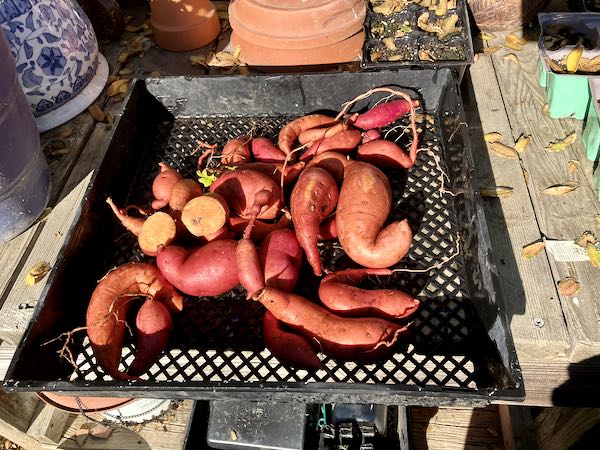
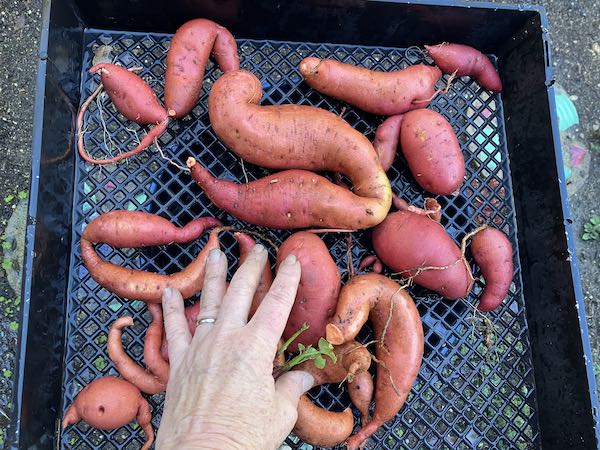
I decided to dig the sweet potatoes that have been growing for around 6-8 months, if you count the time I started them In the kitchen window last spring. One sent its roots outside of the gopher basket, and of course that’s exactly where my shovel went. I put my wizened aged hand in the second photo so you can see how big they got. Last year they were about the size of my thumb, so I determined if this year wasn’t a decent crop, I wouldn’t bother again. “Decent”? That’s pretty subjective, considering this is the produce of about 10 plants. (Thank a farmer, if you know one. Without them, we’d be pretty hungry.)
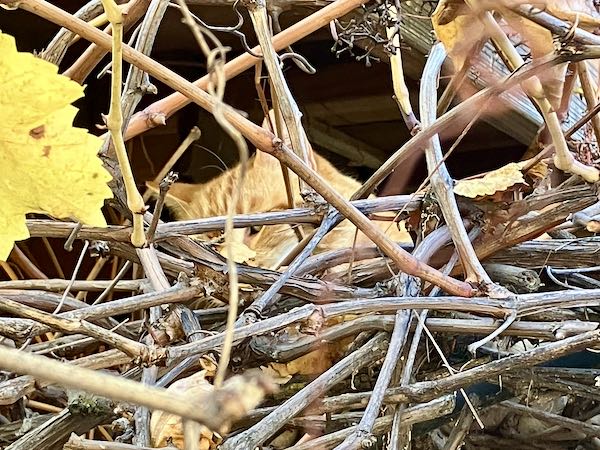
Someone was watching from above.
My paperwhites bloom in December. Three Rivers doesn’t experience very much winter weather.
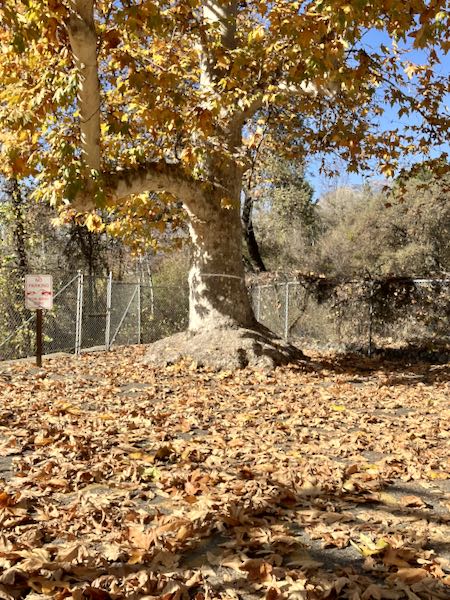
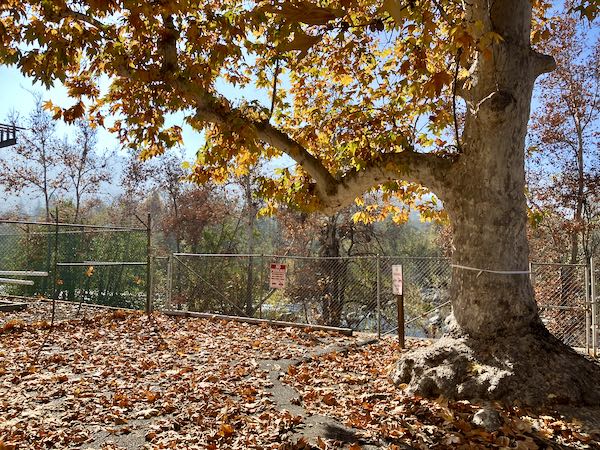
WALKING IN THREE RIVERS
Such a beautiful day required a walk. This sycamore is magnificent! A friend told me it had the largest leaves she’d ever seen on a sycamore; we figured out that she only sees the ones that grow in town, not the natives which are old and have lived by a source of water for decades (centuries??)
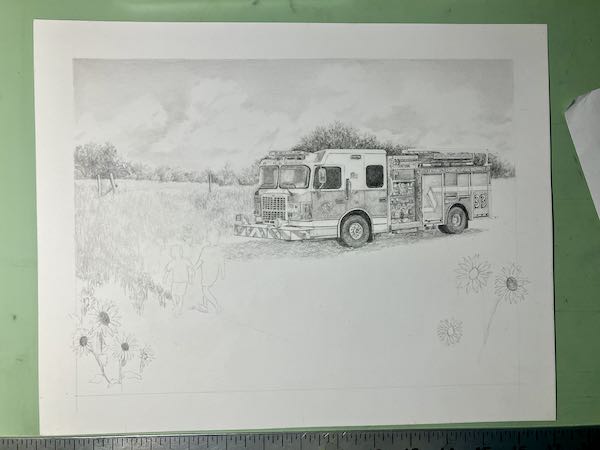
DRAWING IN PENCIL
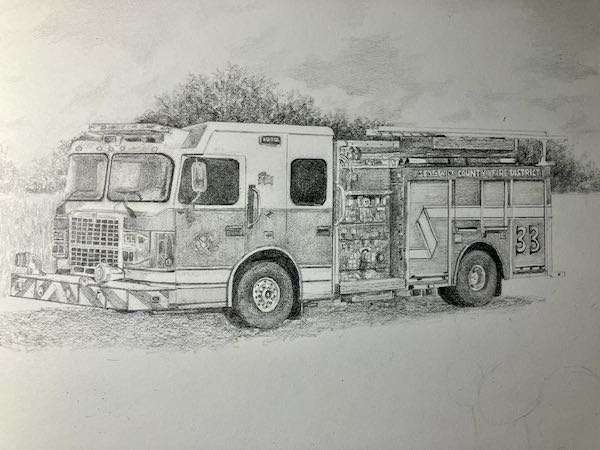
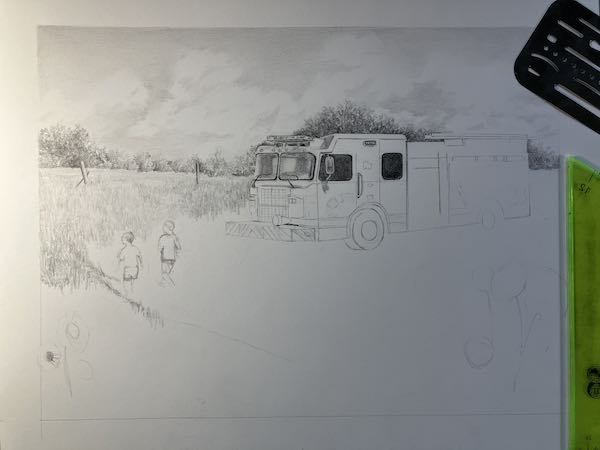
Finally, I got myself into the studio to inch ahead on this very challenging commissioned pencil drawing. That “vending machine” was potentially going to keep me awake at night if I didn’t get it figured out. It may not be recognizable to a fireman, but that’s as “right” as it is going to be. (The paper is white; it looks gray because I used the phone under low light conditions to take this photo.)
I worked a bit harder on the two little boys, size, location, and shapes. Ditto for the sunflowers. I don’t know Kansas wildflowers, but I know that the state wildflower is a sunflower. If I can fake a vending machine on the side of a firetruck, I should be able to handle sunflowers. (No, it’s not a vending machine; that’s how it appeared to my ignorant self.)
SIMPLY HOME
The show hangs until December 29 at CACHE in Exeter. Their hours are Friday 1:30-4, Saturday 10-4, Sunday noon-4. It includes about 50 paintings, 3 original pencil drawings, calendars, cards, coloring books, The Cabins of Wilsonia books, and a few pencil reproduction prints.
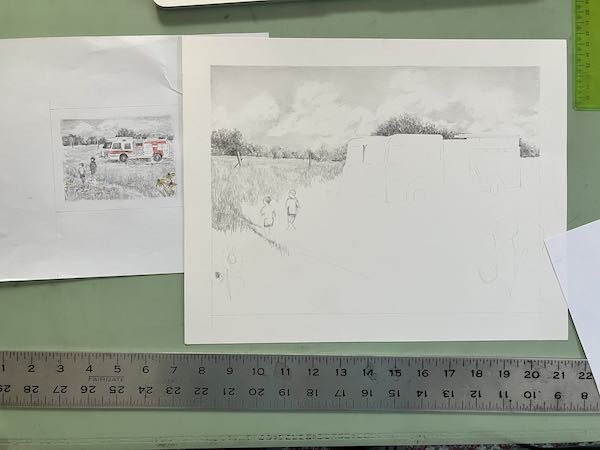
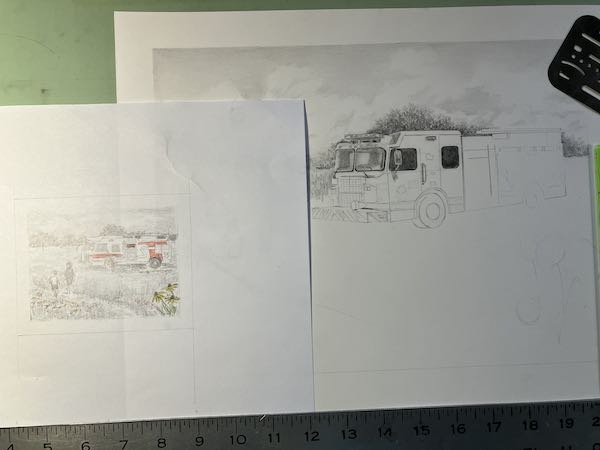
Good thing that you (and my customers) know that I know how to draw, or this rough sketch would cause everyone to back away slowly, wondering how I could call myself an artist.
This is a compilation, a conglomerate, a composite, of unrelated photos, following the ideas and instructions of a customer/friend with an interesting request. We have worked well together in the past; he answers all my questions thoroughly, tells me the truth, and I persist until he lets me know that I have gotten it.
When I started drawing on big girl paper. I was nervous, so I started with the sky, moving forward to the distant landscape, and then, as detailed and difficult as it is, the firetruck was still preferable to the little boys.
It has a section in the middle of the side that looks like a vending machine. WHAT?? That part can just sit quietly until I have no choice but to tackle it. It often behooves me to procrastinate on difficult sections, because . . . you know what I am going to say. . . say it with me. . . “MORE WILL BE REVEALED!”
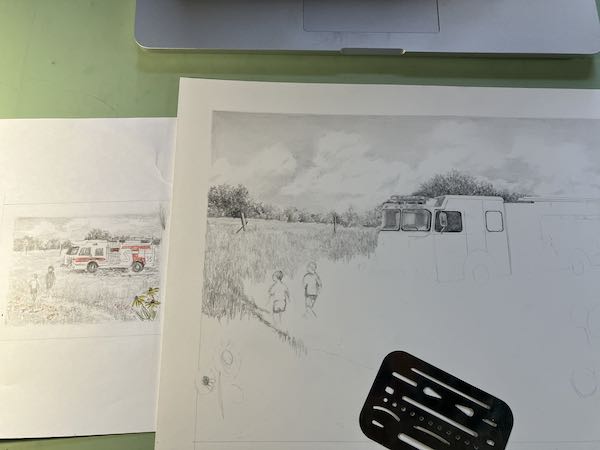
The most difficult aspect of this type of drawing is figuring out what sizes the various parts need to be in relation to each other.
Each day that I work on this, I text the day’s progress to the customers. The reasons are so they know I’m working and tell me that I am doing a good job.
(When my drawing students want to draw things this difficult, I say no. When they persist, I am convinced they hate me.)
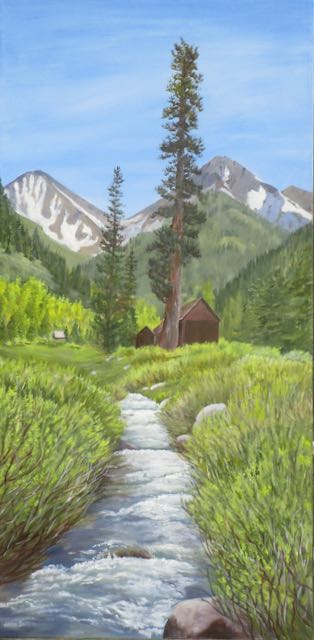
SIMPLY HOME
Classic Mineral King III, 18×36″, $1500
The show hangs until December 29 at CACHE in Exeter. Their hours are Friday 1:30-4, Saturday 10-4, Sunday noon-4. It includes about 50 paintings, 3 original pencil drawings, calendars, cards, coloring books, The Cabins of Wilsonia books, and a few pencil reproduction prints.
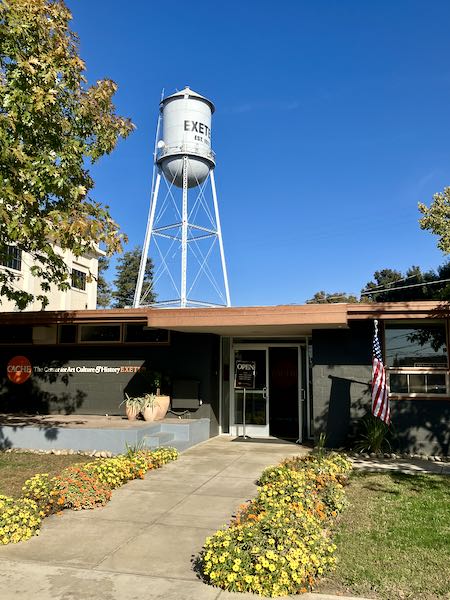
Last night was my presentation “How To Draw” at CACHE, the gallery and museum in Exeter. This was more of a talk than a demo, about a subject upon which I could bloviate for hours. Alas, it was just one hour, 6:30-7:30, because I know people’s attention spans are limited. Besides, I was missing dinner.
There were about 20 men, women, and children, all attentive and interested. I told brief stories, showed examples, explained the steps I use to draw, explained tools I used, and handed out one exercise for people to try. Everyone drew! I love helping people draw, and I think everyone had fun. Nope, I know everyone had fun!
The funniest moment was when I was standing behind a couple of participants, looking at their work, getting ready to advise on a small matter or two, when I felt something weird. Twice. I said, “Hey Dwight, something just dripped on my head!” Dwight is the president of the gallery board, and he quickly moved to the end of the room and climbed a ladder to the roof! Charlie is a board member, and he was right on Dwight’s tail. (They both got some drawing done in spite of the disruption.)
THANK YOU! I truly felt useful last night.
P.S. It was free. If anyone asked about how to pay me, and one did, I said to donate to CACHE. If you were there and are wondering the same thing, donate to CACHE. (Something has changed on my website AGAIN, and I cannot find the tool to make the link to CACHE be clickable in this post. https://cach-exeter.org)