Finished Pencil Drawing of a Cabin

I sure do know how to stretch a story out. . . have you noticed how many people use the cliché “long story short”, and then proceed to make a short story even longer? I am sort of doing that here, except I break it into chapters for you, because of another cliché that applies to many blog posts: TLDR (Too long, didn’t read).

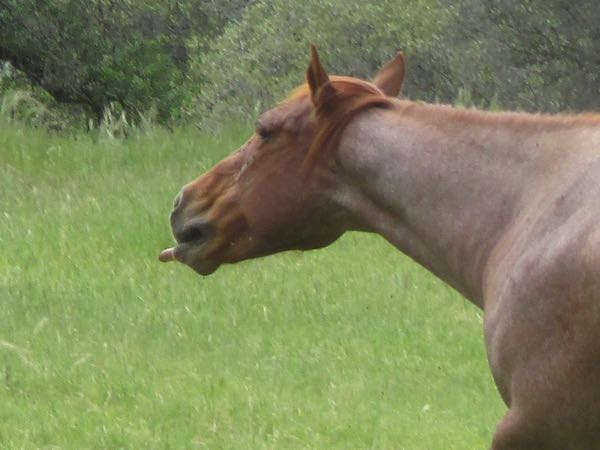
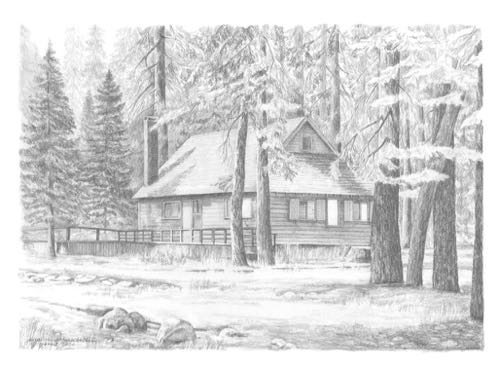
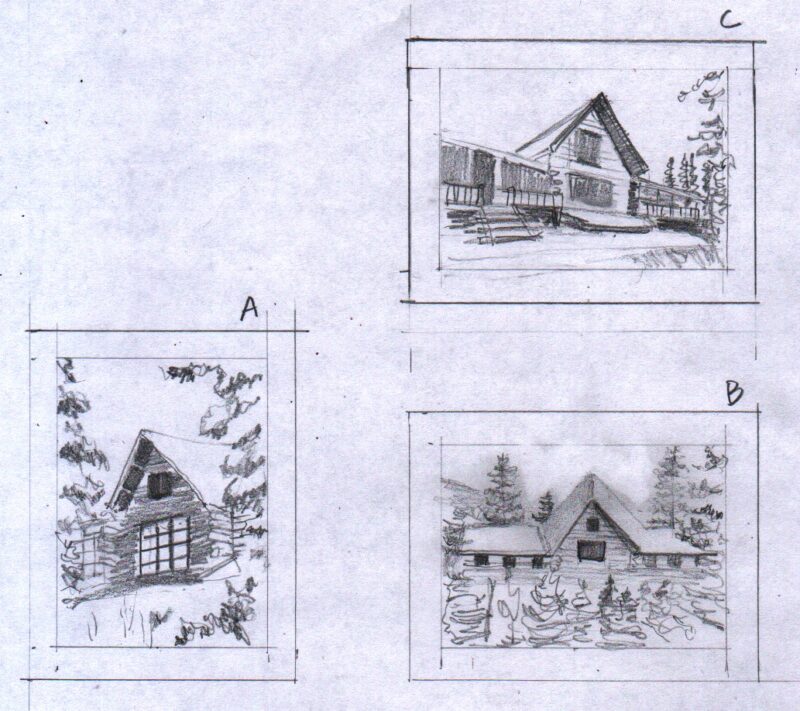
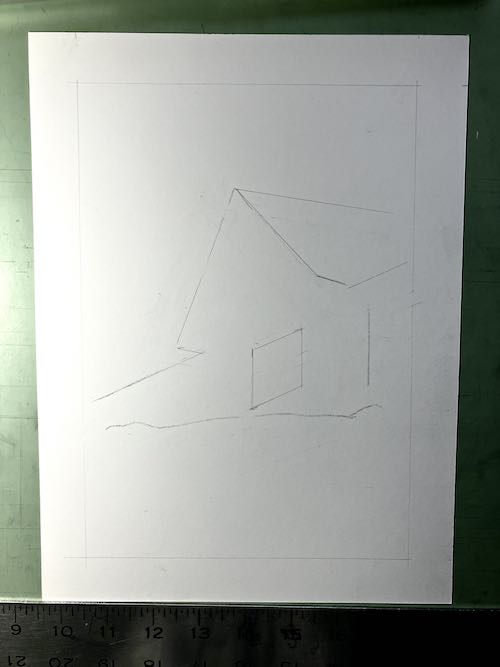
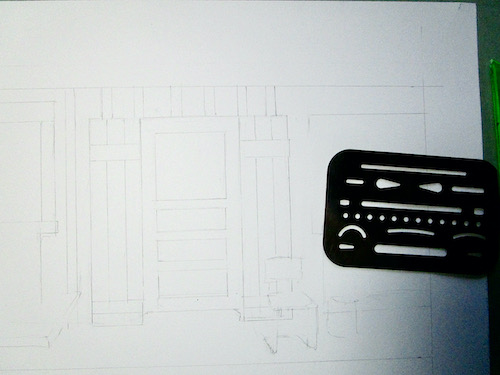
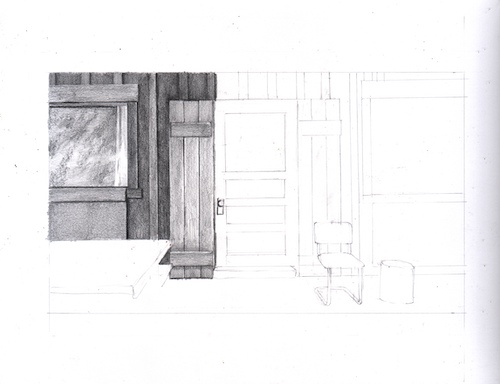
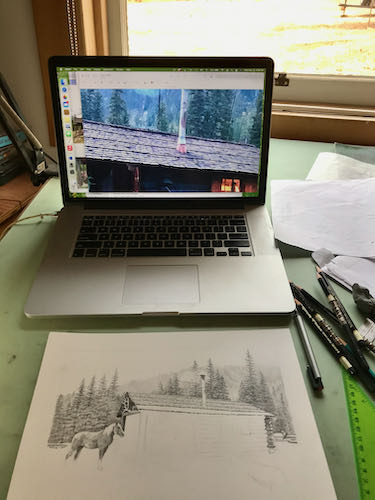
Here is scanned Minnesota cabin drawing before I scrubbed it up on Photoshop Junior.

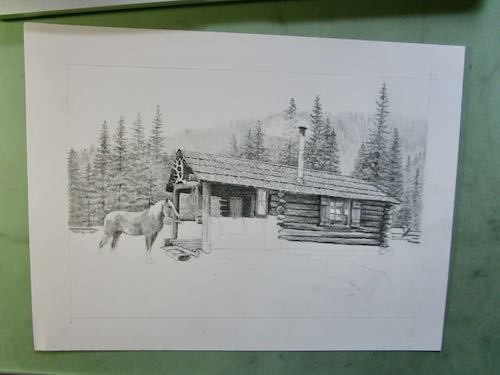
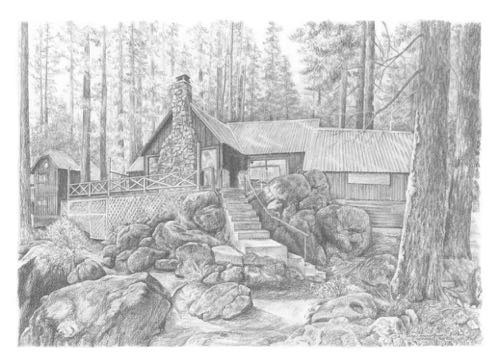
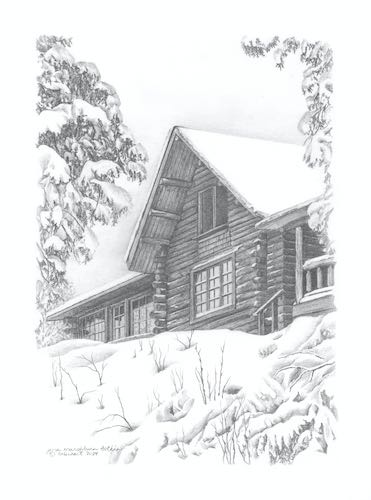
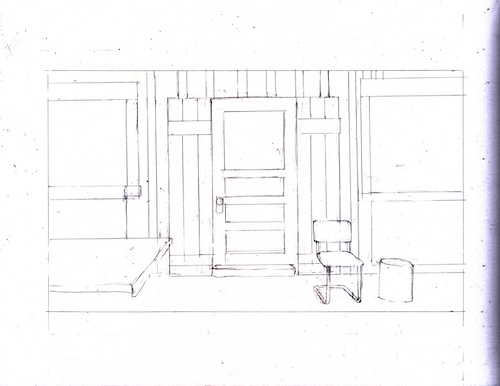
Here it is converted to gray scale with all the chuds erased and the paper color also erased. Chuds are marks on the scanning bed—this word came from the days when I worked in a frame shop. Sometimes after you’d get a piece of art all sealed up under the mat and frame and backing, with paper secured over the back, you’d flip it over and there would be a little something under the glass. My co-workers called these little somethings “chuds”.

A few more thoughts. It was a thrill to have a stranger find me over the interwebs, because people are always contacting me to say that my Google ratings are too low and that they can help me. (No thanks, you creepy Stalking Strangers; how did you find me on Google if my ratings are too low??)

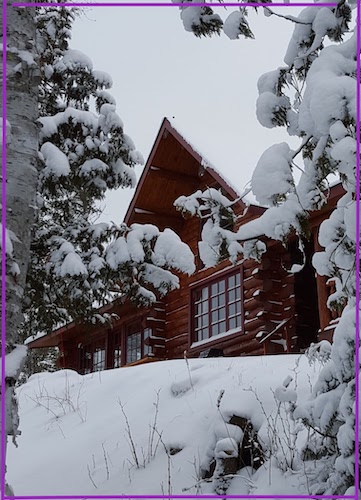
The customer was a pleasure to deal with. She mailed a check when I told her that PayPal takes a bite, she replied quickly when I asked for more information, and she even marked up the photos so I would know who was on first and what was on second.

Alas, I learned something the hard way. A few months ago, I raised my prices for pencil drawings. It had been years (decades??), and it just seemed like a wise move. BUT I DIDN’T RAISE THEM ON MY WEBSITE. Sigh.

Someone could use a business manager, an administrative assistant, a Girl Friday, a right-hand man. Hmm, I guess that’s the problem: my man is left-handed!

P.S. If you are curious about my prices, you can see them here: Pencil Drawing Prices. I only show the smallest and the largest, because sometimes it is all just too much information and too much work. (I’d rather be drawing.)

Drawing a Cabin in Pencil

Which of the three sketches of a Minnesota cabin did the two sisters choose?

They chose A! (The exclamation mark is because that was the one I was hoping for.)

I cropped all the extraneous cold stuff. The sisters asked if I could show a bit more porch, and the best I could say was, “I’ll try.” There just wasn’t much to work with.

I spent an entire hour struggling to place the cabin so that there would be room for part of the wings on either side of the gable, in order to squeeze in a hint of the porch. It took a very long time to get the angles exactly right. This sounds excessive, but architectural subjects are not forgiving, and if you don’t get the skeleton down correctly, the parts don’t fit.

Finally, I was able to begin. (The picture of the drawing below is accidentally cropped—it actually has a 1″ margin around the image on this sheet of 9×12″ archival smooth expensive paper.)

Oh no! When I look at the photo I am using, the window size in the winter photo doesn’t quite match the summer photo that shows the gable end. Further, on the summer view of the gable end, there are 3 rows of shingles beneath the upper window.

Time out. I need some instructions, please!

So, I emailed the sisters.

What happened next??

Tune in tomorrow. . .

How to Draw with Graphite and Colored Pencils, Ch. 2

Happy Birthday, Trail Guy!

Hello, my guinea pig friends! Today I continue testing out my tutorial writing skills. 

The Next Steps

Step five: Straighten out the lines. It is NOT “cheating” to use straight edges. If it took a tool to build the actual item, it most likely will take a tool to draw it accurately. There is quite a bit of erasing at this stage, and I use the erasing shield to remove the tiny lines that are wrong. I want my work to be clean and accurate, without hairy or double (or triple) sketchy lines.

ANTI-SMEAR TACTIC: When you erase, you make crumbs. If you flick them with your hand, you will smear. If you blow, you might spit. (Yes, spit happens). Use a drafting brush, a soft paint brush, an antique shaving brush, whatever you have.

Step six: start shading. Shading is the fun part, the party! It is when things come alive with textures and depth. Because I am right handed, I start on the left and the top. This keeps me from dragging my hand across the shaded parts and smearing it. 

I start with a 4B, using the side of the lead. The photo has lots of indiscernible blobs in the window, so I chose to just do some fuzzy sloping strokes, almost a painting technique. Keep the pressure very light, because you can always add more, but it is a hassle to erase if you get too strong in the beginning. 
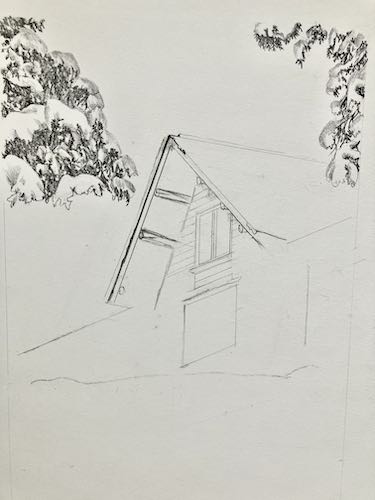
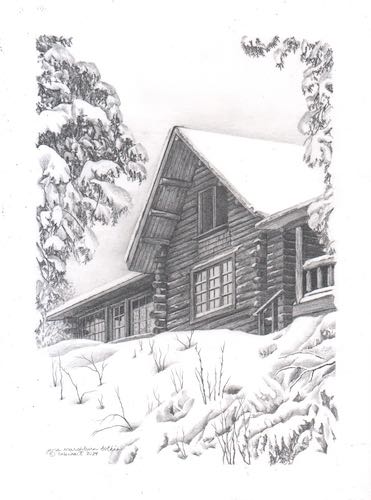
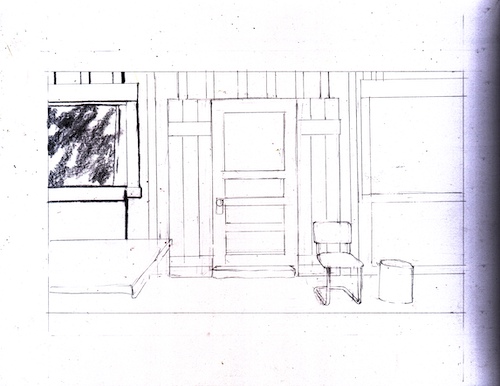
The scan looks much darker than the actual drawing because I want the texture to show.

PENCIL TALK: There is no industry standard, so the same pencils look different in different brands. “B” means black; “H” stands for hard. The higher the number with the B or H, the more of that particular quality. For example, 4B is blacker (and softer) than 2B; 6H is harder (and lighter) than 4H. HB is smack dab in the middle, and is the equivalent of a #2 pencil, which is a completely different pencil rating system.

Step seven: Continue layering. Over the 4B, I put 2B using the same type of strokes, and extended it to some new areas, then followed with HB layered on top of the previous layers, and ended with 2H, on top of the previous layers and on the rest of the glass on the window. I just kept layering, working on the glass and the wood surrounding it. I build my shades with many layers rather than pressure, and mostly use the side of the lead rather than the point. Then I come back with a point to sharpen the edges.

I think we will have about 2 more days of this tutorial, and then I’ll abruptly change topics so I don’t lose my readers who are bored with watching paint dry.


Drawing While Paradise Burns

That’s Paradise Ridge, not Paradise the town, which we know burned a couple of years ago (or was it last year? It’s all a smoky blur).

Trail Guy and I spent a good chunk of a morning talking about what to take, making piles, filling boxes. All the while, we had no intention of evacuating unless the fire gave us no choice. 

What are these relics? Is that ash? Are there any treats? Tucker wants to know.

After getting our piles somewhat in order (oh dear, I have way too many sweaters – how am I supposed to decide which ones to leave behind, possibly to never see again??), I went out to the studio to get some work done. Having an emergency doesn’t give me license to create emergencies for my customers.

This drawing might be a little bit too hard for me. Many details are hidden in shadow, and there is a horse. (At least his tongue is inside his mouth). It is good to tackle the hardest part first.

There might be a problem with his feet, so I moved onto the things that I can do with one hand tied behind my back and half my brain occupied with wildfires (and sweaters).

Working from the laptop screen definitely has its advantages. I can embiggen the photos and even lighten the shadows to understand what the various black blobs are.
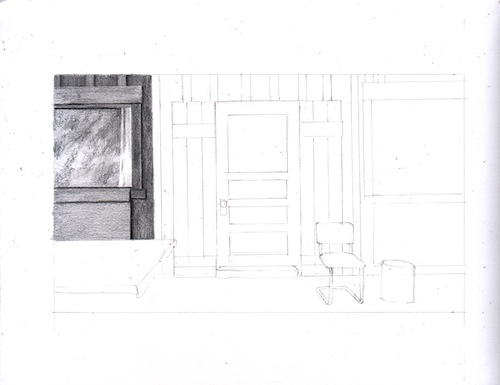
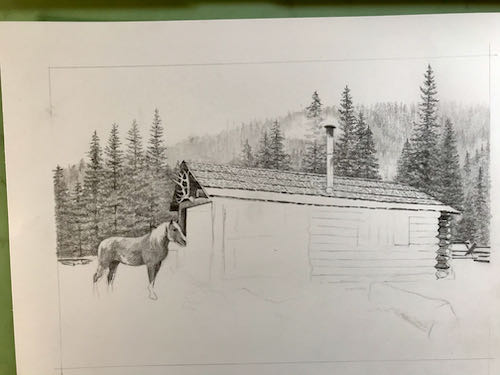
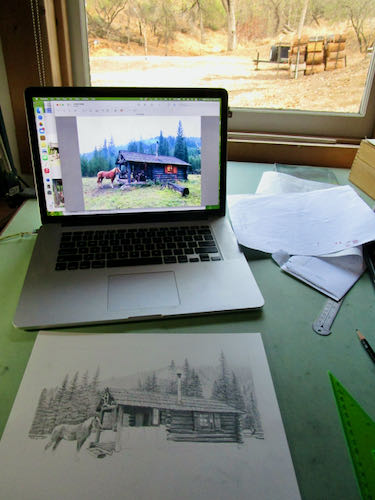
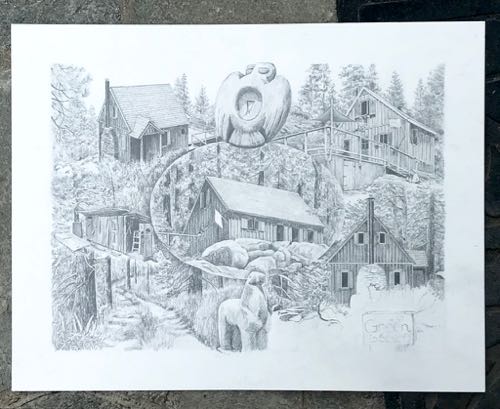
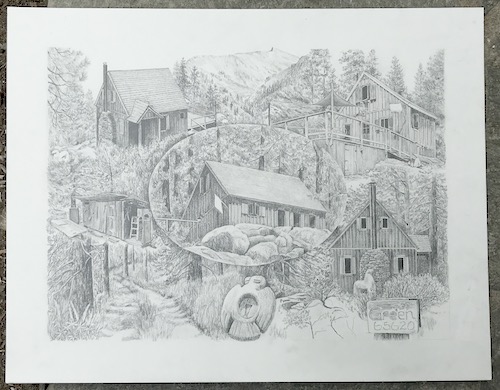
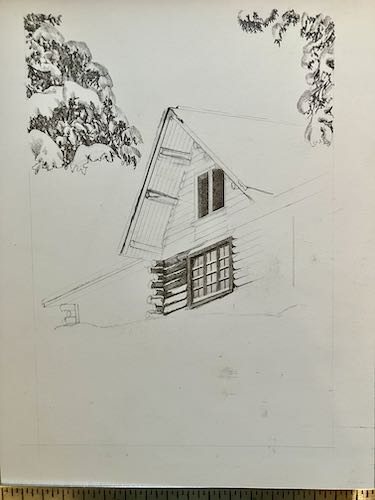
I drew most of the afternoon while listening to helicopters overhead, a welcome sound after they were silent throughout the smoky and worrisome morning.

And this is how it looked at the end of the day.

This is a commissioned pencil drawing of a cabin in Montana for a repeat customer who is a joy to work with and for.

In case you were wondering about the reference to the horse’s tongue, here you go.


Three Delivered Pencil Drawings

A thoughtful and generous man hired me to draw 5 cabins for 5 different friends who lost them in the wildfires. He asked me to not put them on the blog, because they were to be surprises. He must think that I have a larger readership than I do; on the other hand, this is Tulare County, where there aren’t 6 degrees of separation – it is more like 1-1/2.

Three of the drawings have been delivered. The customer sent me photos of the recipients, but because this is the World Wide Web, I’ll just show you the cabin drawings without the recipients (even though some are wearing masks). 

Adjusting and Advancing

I did it again – worked with a customer until she was happy with the sketch, and then after doing the drawing (well, not completely finishing), she wasn’t entirely happy with the results.

This is my fault because when I saw there was a problem, I made an unauthorized change to try to fix it. Instead, I should have gone to her first and said, “I think there is a balance problem here”. But if I had said that and she liked it, would she have felt stupid? It is a good policy to never lead a customer into feeling stupid. 

She made a suggestion, I countered it by proposing an additional adjustment, and then I warned her that erasing may leave a shadow. She was okay with that, so I feel good about our combined decision. 

Here is the before:

This is the after:

 I am once again awaiting her approval in case there are more adjustments. More will be revealed in the fullness of time.