Happy Birthday, Trail Guy!
Hello, my guinea pig friends! Today I continue testing out my tutorial writing skills.
The Next Steps
Step five: Straighten out the lines. It is NOT “cheating” to use straight edges. If it took a tool to build the actual item, it most likely will take a tool to draw it accurately. There is quite a bit of erasing at this stage, and I use the erasing shield to remove the tiny lines that are wrong. I want my work to be clean and accurate, without hairy or double (or triple) sketchy lines. 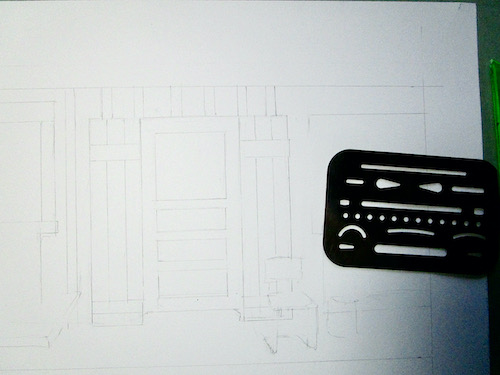
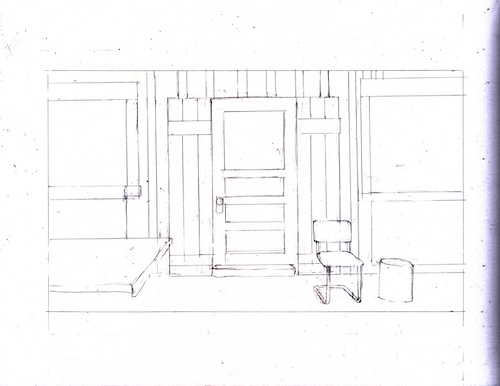
ANTI-SMEAR TACTIC: When you erase, you make crumbs. If you flick them with your hand, you will smear. If you blow, you might spit. (Yes, spit happens). Use a drafting brush, a soft paint brush, an antique shaving brush, whatever you have.
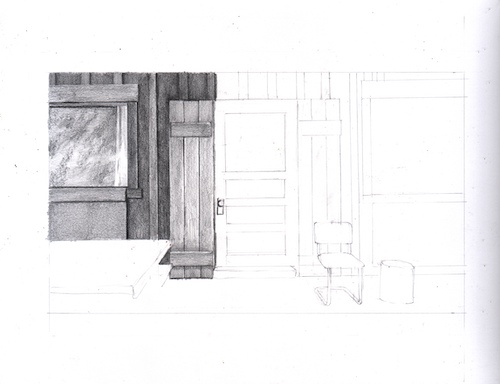
Step six: start shading. Shading is the fun part, the party! It is when things come alive with textures and depth. Because I am right handed, I start on the left and the top. This keeps me from dragging my hand across the shaded parts and smearing it.
I start with a 4B, using the side of the lead. The photo has lots of indiscernible blobs in the window, so I chose to just do some fuzzy sloping strokes, almost a painting technique. Keep the pressure very light, because you can always add more, but it is a hassle to erase if you get too strong in the beginning. 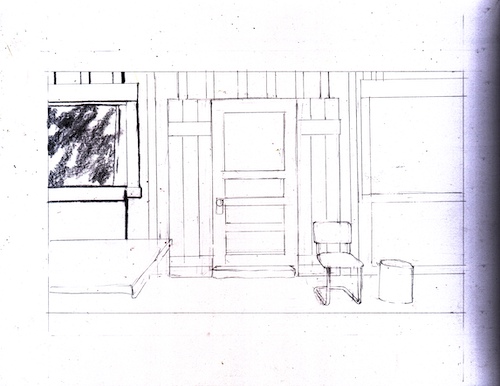 The scan looks much darker than the actual drawing because I want the texture to show.
PENCIL TALK: There is no industry standard, so the same pencils look different in different brands. “B” means black; “H” stands for hard. The higher the number with the B or H, the more of that particular quality. For example, 4B is blacker (and softer) than 2B; 6H is harder (and lighter) than 4H. HB is smack dab in the middle, and is the equivalent of a #2 pencil, which is a completely different pencil rating system.
Step seven: Continue layering. Over the 4B, I put 2B using the same type of strokes, and extended it to some new areas, then followed with HB layered on top of the previous layers, and ended with 2H, on top of the previous layers and on the rest of the glass on the window. I just kept layering, working on the glass and the wood surrounding it. I build my shades with many layers rather than pressure, and mostly use the side of the lead rather than the point. Then I come back with a point to sharpen the edges. 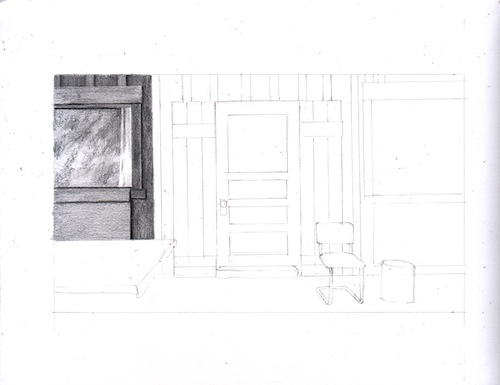
I think we will have about 2 more days of this tutorial, and then I’ll abruptly change topics so I don’t lose my readers who are bored with watching paint dry.
2 Comments
I learned that you layer! I didn’t know you could put down the softest layer first, then the harder layer.
Donna, this is a difficult concept to remember because it seems to be the opposite of what one would do. I show all my drawing students when they are becoming familiar with their pencils, and NO ONE remembers it!
Comments are closed for this article!