Another Emailed Drawing Lesson

Remember Buck, AKA Mr. Curly? C and I are continuing to work on him via email. She is a remarkably clear communicator, so this is working out well for us. She had specific questions, which always makes it easier to offer instructions.

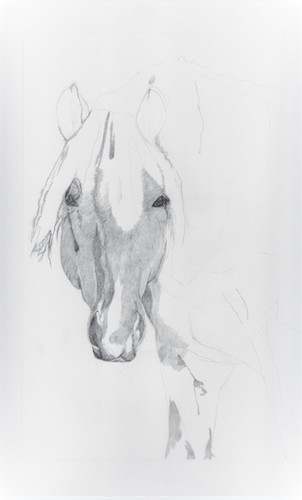
This is how he looked when we last saw him. I sent her written instructions that corresponded to each colored oval.

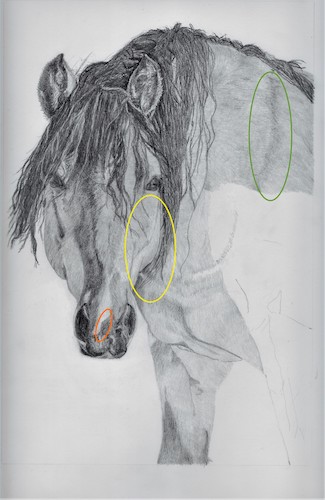
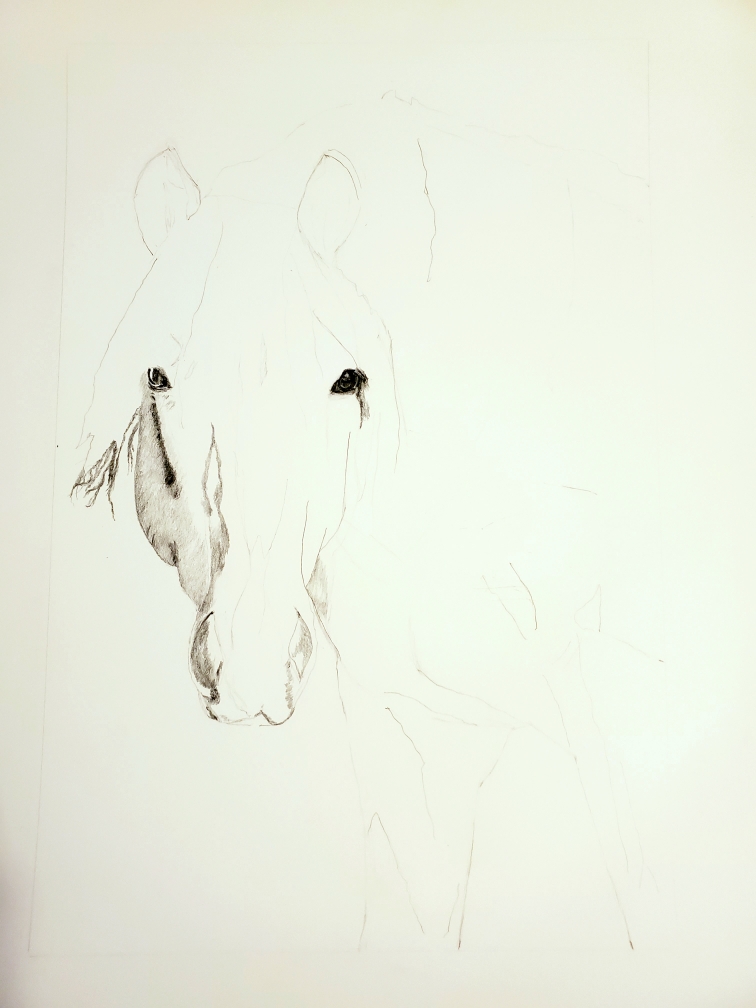
This is the most recent iteration of Buck, complete with more colored ovals.

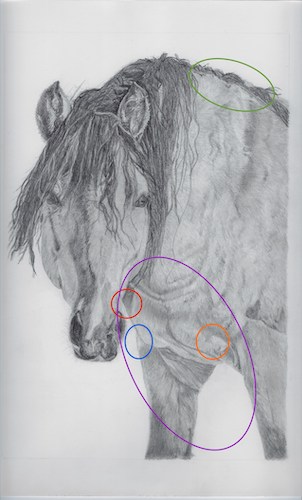
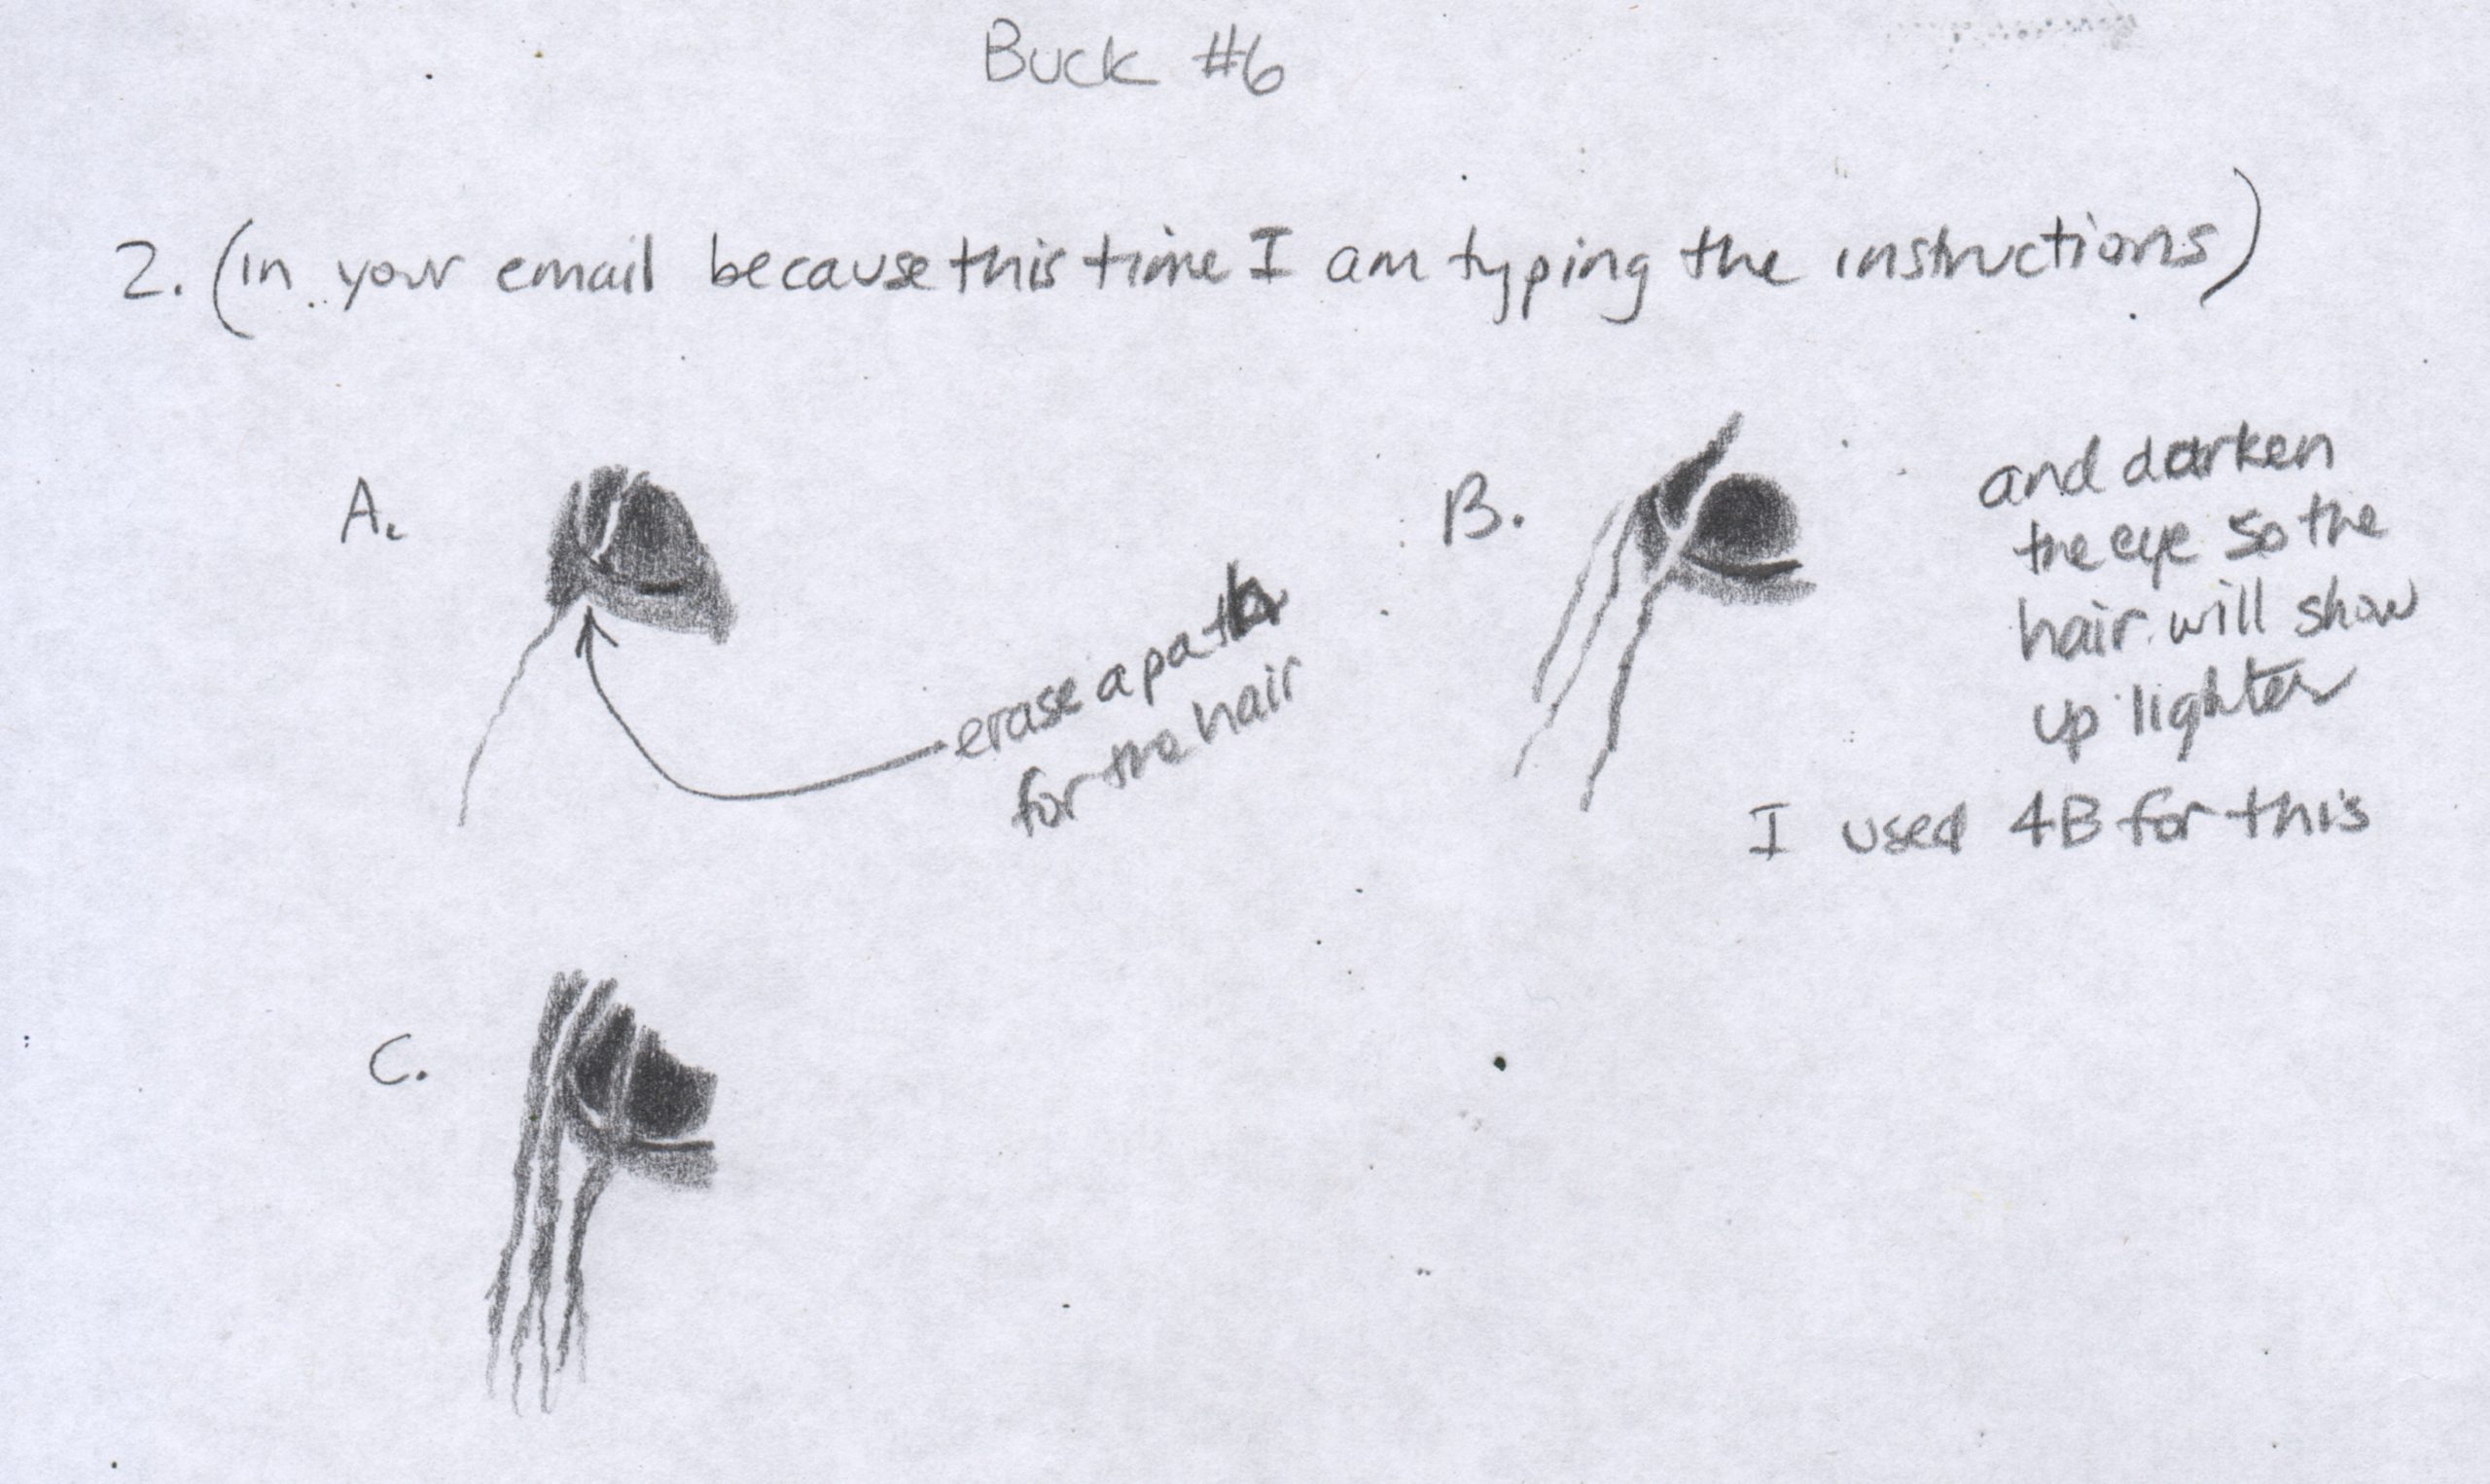
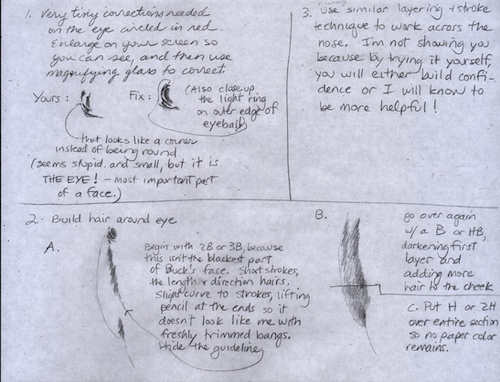
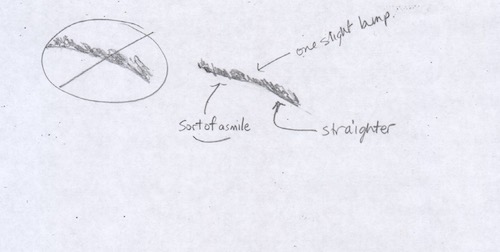
1. The upper neck/mane: You were right about this area. (She had circled it, said it looked wrong and asked about a particular fix.) If you study this area on the drawing versus the photo (I recommend upside down), you will see that the mane sort of curves downward into the neck. Hmmm, words aren’t working. Let me show you.
2. My blue circle: At the intersection of the leg and chest, that slight corner needs to be higher. Look at the photo to see EXACTLY where it lines up with the nostril. Essentially, you will be lengthening the leg by making that intersection a bit higher. Look at it all upside down to re-examine the shape between the face and chest. (A tiny thing that might not matter, but I am scratching around, looking for answers).
 
3. Red circle: study the photo to see where the nostril/cheek indentation and the neck intersect. (Another tiny thing that might not matter but try it just in case. . . )
 
4. Purple circle: All of this area needs to be much darker with the segments less defined because they are in shadow. The exception – keep this little bump light.
 
Does this all sound like gobbledygook to you? Good thing C and I have been working together for a couple of years, because it does make sense to her. 

Electronic Drawing Lesson with Buck

Remember my drawing student, C? She and I have been doing drawing lessons through email since last year. I haven’t updated you on her pencil drawing of a horse named Buck, whom I referred to for awhile as Mr. Curly.  I have been posting about other things, while C has been working diligently.

The last time I showed you:


The mane is looking great. She has now begun “undercoating”, just laying down pencil for a base coat while she waits for me to tell her something helpful. I actually had very little to say because she is doing a great job on her own.

This is what I told her:

1. Yellow: the cheek sticks out a bit too far. I noticed because his face seems noticeably curvy in your drawing. This made me check the photo, and when I put a box around the area on the drawing and one around it on the photo, I could see the drawing had a wider box. Just carve off a little of the cheek by widening the mane on the right side of the cheek. A fraction ought to do the trick.
 
2. Orange: blur the edge between the dark and the light of this area so it looks like something is changing color instead of being 2 separate pieces ofnthe face/nose.
 
3.  Green: Obviously you aren’t finished with this yet so this is just a heads-up to be sure to have the dark parts of the coat much darker than the bright-light parts. There is a ton of contrast in the photo, which is part of the appeal.
 
GOLD STAR FOR YOU!! 
 
Here is her original photo so you can see what I am referring to:

And if you would like to see the previous posts about virtual drawing lessons with C, here is the list. (Each link will open in a separate tab so you don’t lose this page.)

Previous Lessons

The beginning

Lesson 2

Mr. Curly Becomes Buck (lesson 3)

Lessons via email (lesson 4)

Soldiering on (lesson 5)

It is possible I missed a link to a post; it is more possible that I just didn’t keep you all current.

Drawing Buck

My drawing student C and I continue to work on her pencil drawing of the horse, Buck. This last time she took a photo of the drawing instead of scanning it. I tried to help and was able to show her how to put a lock of hair across the eye. She also asked me about her hair shading techniques, and after staring at it a bit, I finally concluded that it was all too squarified for me to tell what was pencil and what was pixel.

Here is what I told her in the email (because I think my writing is a little bit too sloppy):

“About the hair crossing over the eye: The question to be answered is always: Which is darker? sometimes the only way to tell is to squint at the photo so the detail and color blur. Another way is to turn your photo to black and white, but this sort of feels like cheating. Well, not cheating, but bypassing the ability to learn to see values by letting the computer do the work. Often the black and white method backfires, because the 2 things are the same value (darkness). This means you get to decide (you are the boss of your picture.)
 
“The hair is darker in some places and lighter in others. Just make the adjustments to whatever is behind the little clumps so that it shows up. It is okay for the clumps to look broken or disconnected.
 
“Hair always tapers at the tips.
 
“I can’t help you on the shading; because of the pixelation, it is too hard to tell what you have actually done and what is getting squarified. 8-( 
 
“You can either keep going and then scan it, or you can rescan this and I can keep going here!”
 
So, this lesson is on hold for a bit.
My show “Still Here” is still there, at Arts Visalia, that is. The phone # to make an appointment to see it is 559-739-0905. Gallery hours are Wednesday through Saturday, noon-5:30. The last day to see my work there is Friday, April 30.


Mr. Curly Becomes “Buck”

In the ongoing virtual drawing lessons, (actually happening via email rather than Zoom or video) the horse that my student C is drawing has a name, and it isn’t Mr. Curly; the name is Buck. This reminds me of a scene in a Chronicles of Narnia movie (one of the few movies I have seen or actually remember anything) of one of the kids riding a horse. He says to the horse, “Giddy-up, Horsie.” The horse turns his head back a bit and says in a very disgusted and dignified voice, “The name is Phillip.”

Please excuse the digression.

C sent me her drawing with the eyes completed. I circled one eye in red, then wrote up the notes demonstrating the next steps. I hope you can read my writing. But perhaps you don’t care, and only came to look at the photos.