Skip to content

Electronic Drawing Lesson with Buck

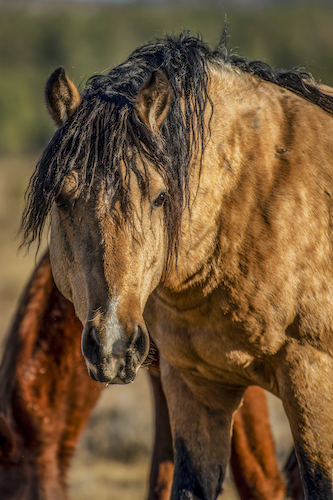
Remember my drawing student, C? She and I have been doing drawing lessons through email since last year. I haven’t updated you on her pencil drawing of a horse named Buck, whom I referred to for awhile as Mr. Curly.  I have been posting about other things, while C has been working diligently.

The last time I showed you:


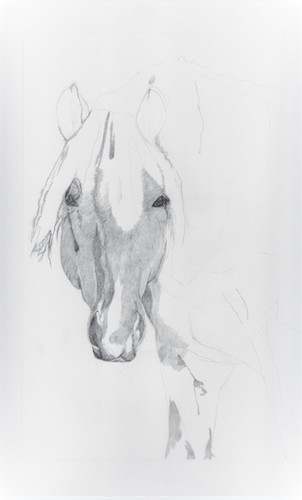
The mane is looking great. She has now begun “undercoating”, just laying down pencil for a base coat while she waits for me to tell her something helpful. I actually had very little to say because she is doing a great job on her own.

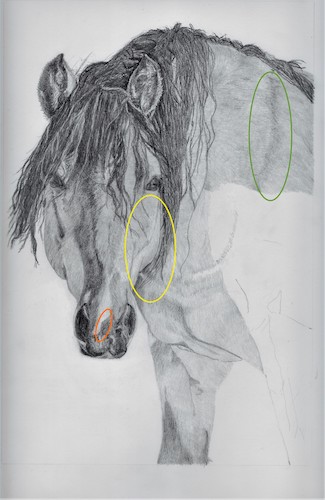
This is what I told her:

1. Yellow: the cheek sticks out a bit too far. I noticed because his face seems noticeably curvy in your drawing. This made me check the photo, and when I put a box around the area on the drawing and one around it on the photo, I could see the drawing had a wider box. Just carve off a little of the cheek by widening the mane on the right side of the cheek. A fraction ought to do the trick.
 
2. Orange: blur the edge between the dark and the light of this area so it looks like something is changing color instead of being 2 separate pieces ofnthe face/nose.
 
3.  Green: Obviously you aren’t finished with this yet so this is just a heads-up to be sure to have the dark parts of the coat much darker than the bright-light parts. There is a ton of contrast in the photo, which is part of the appeal.
 
GOLD STAR FOR YOU!! 
 
Here is her original photo so you can see what I am referring to:

And if you would like to see the previous posts about virtual drawing lessons with C, here is the list. (Each link will open in a separate tab so you don’t lose this page.)

Previous Lessons

The beginning

Lesson 2

Mr. Curly Becomes Buck (lesson 3)

Lessons via email (lesson 4)

Soldiering on (lesson 5)

It is possible I missed a link to a post; it is more possible that I just didn’t keep you all current.

Comments are closed for this article!