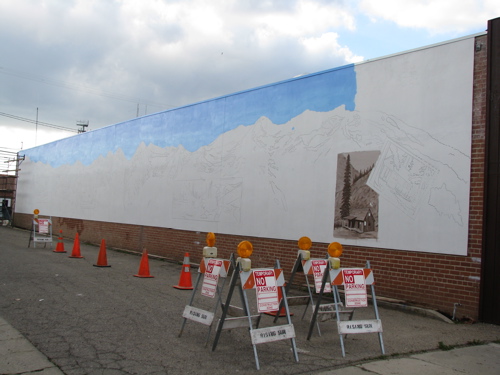
It was rainy this a.m. but I decided it was just bluffing so I went down the hill to paint. The sky has been waking me up in the middle of the night, so I just HAD to start on it today!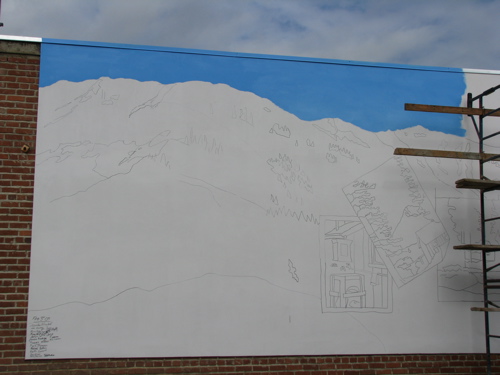 This stretch is the first length of the scaffolding. I must have climbed up and down about 20 – 30 times today (been eating bananas hoping the monkey effect will kick in!). It is a bugger to move – Curtis from a couple of doors down helped me out quite a bit today. And there was that one time when the wheel went between the curb and the board – it caused an emergency phone call to Rising Sun Construction. William came with a shovel and leveled out the rest of the boards, minus the end which will have to be dealt with tomorrow. I bet you are wondering what that little blur is on the bottom left corner. It is the signatures of those who helped with the projection:
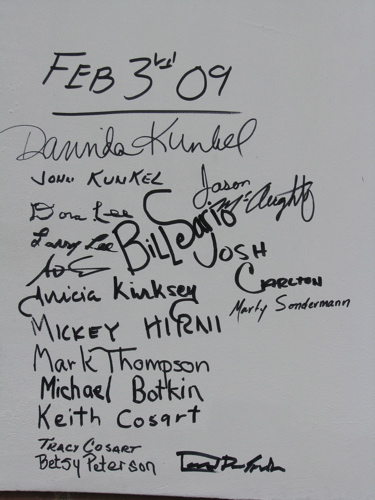 I worked all a.m. and still didn’t cover half the sky. This was with a giant brush, bought this morning just for the sky. “Giant” is a relative term – nothing is “giant” compared with this wall! Here are the final photos for the day:
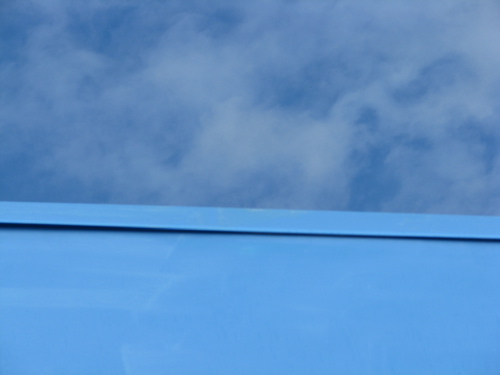 The blue doesn’t quite match real sky, although it does match the model painting. It may get adjusted on the second coat.
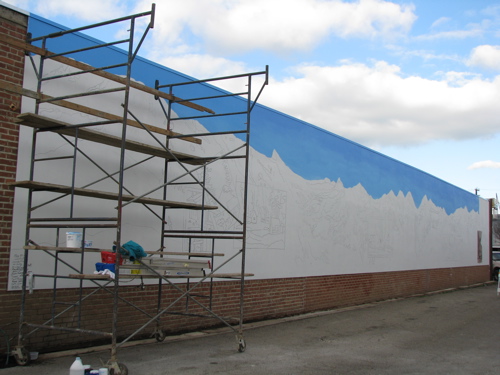
 See how the curbing drops at the front end? Curtis and I moved the scaffolding as far forward as possible, but I couldn’t reach the top even on my tip-toes and leaning out (don’t tell my mom I did this!) The climbing is getting easier, but I’m thinking a lift or cherry-picker might be necessary to get the sky to blend all the way across. It is a little tough to match when it takes so long to move the scaffolding from patch to patch. More will be revealed. And it only rained a little – no big deal!
Mural, Day Two
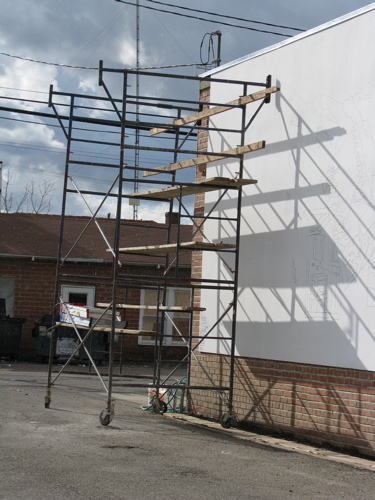 Notice the railings on the top level! I can now begin on the sky without wondering if I will go splat! on the ground or get hung up between the scaffolding and the wall. THANK YOU to Rising Sun Construction!! Michael leveled boards along the wall in the planting bed (actually it seems to be more of a cat box than a planting bed. . .) so that the scaffolding can be rolled along as I work the sky. THANKS, Dear Husband!
 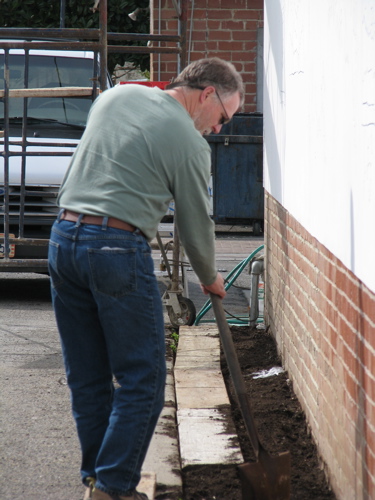 He also brought my little red wagon so that I can haul my supplies into The Downtown Gallery for storage at the end of each day. THANK YOU Cousin Chris!
 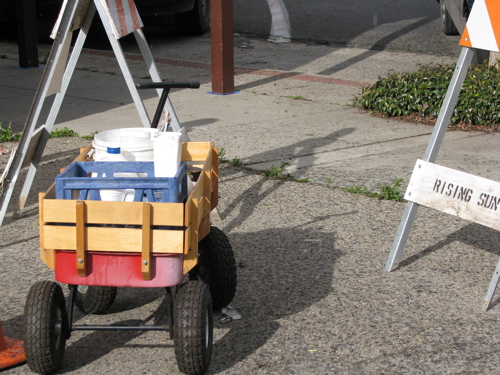 Here is the day’s progress.
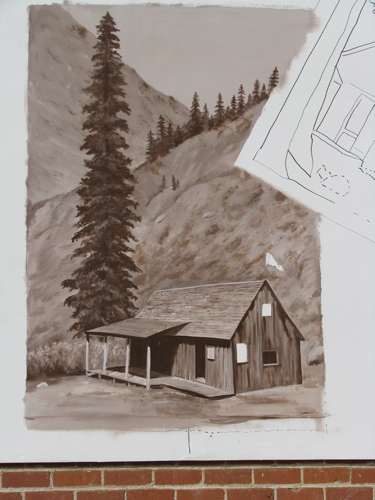 Doesn’t look like a whole lot yet, but it is way way way larger than any canvas I have ever painted. (I’m talking about just this scene being larger, not even thinking of the entire wall because it might cause a tic under my left eye to think about the whole thing.) Next: draw the missing info on the 9 empty feet on the left, begin the sky, and then decide if I finalize the old store/post office now or leave it for another time! A couple of more thanks: THANKS to Trudy S for the coffee and cookie! THANKS to Curtis and to Larry and Dora for the facilities! THANKS to Sharon for stopping by with her mom!
The List
To make a oil painting here is what I have to do:
- paint it to establish the shapes and colors and get the canvas covered
- repaint it more carefully
- paint it again
- put in the tiny details
- name, number and record it on 2 lists
- sign it after it dries
- photograph it
- add a wire
- enter it on the computer and do all the prep to post it on the blog and on the website
- add it to the website
- varnish it
Did I hear someone say “charge more!”? Nah, not until I can’t paint fast enough to meet the demand. There is this bad economy happening out there (hard to see the difference here in Tulare County yet), and I want to be able to offer people a good deal! Currently I have 12 paintings in some stage of this process. This one is waiting to dry so it can be signed. 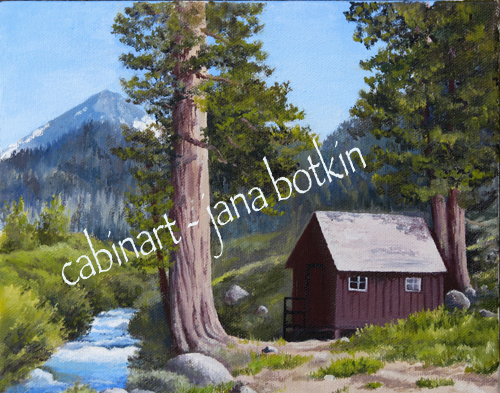 Honeymoon Cabin III – oil – 8″ x 10″ – $80
  Just for fun, this is the first picture I posted on my blog. It was called Honeymoon Cabin II (note the maximum creativity in the titling process). It appears that perhaps my abilities to paint and to photograph my paintings have improved!
Inquiring minds. . .
. . . like to know! Cousin Maggie asked me some great questions about mural painting and indicated that others probably are wondering the same things. So, here we go on a mural tutorial!
- PAINT: Acrylic paint by a company called Nova Color is the paint preferred, no, REQUIRED by the Exeter Mural Team. It is highly pigmented so that it resists fading, and I have chosen the primary colors with the highest lightfast ratings for my mural. In addition to the primaries, I chose Burnt Umber for use on the sepia toned “postcards”.
- BRUSHES: Nadi Spencer is very very good at murals and she does the entire thing with a very small cheap brush. Steven Ball is very very good at murals and he said, “Brushes don’t matter”. Say what?? So far I have used a 1-1/2″ brush from the hardware store and a smallish stiff round brush that I might have had since college for most of my murals (all three of them!) I use a few others too, and have to keep reminding myself to choose the largest ones possible in order to keep up the pace.
- PERSPECTIVE: Because the shapes are projected and traced, the sizes are correct. I paint up close for awhile, then I back up and see if it is right. It usually needs a little tweaking, but not much.
- WEATHERING: The paints are lightfast but murals do fade, depending on the exposure. Northern ones last the longest, Southern ones fade the fastest. Bummer, mine faces south. When I was on the Mural Team, our consultant advised against coating the murals for several reasons. Now I think there are new materials available, but this is the Mural Team’s part, not mine. Because the project started in 1996, they have rehired artists to refresh their faded murals.
- HELP: I can get help for the first layers that just need to be covered in paint. (Someone suggested putting numbers in the spaces like a paint-by-number!) The parts that require detail and my style can only be done by me, as per my contract.
- SCAFFOLDING: It is heavy, but once I get used to how it works, I can probably move it. And there are very nice strong men working in the building who helped me on Wednesday.
Giant Project, Day One
The scaffolding is really really high and can’t get moved closer to the wall yet, and we have to figure out how to fill the blank 9 feet on the left end. See what I mean? So when you can’t do a thing the way you had planned, you make a new plan! (Well, I do, anyway!) So today I practiced moving the scaffolding, climbed up and down a few times (but not to the top – there’s nothing to hold onto up there so I have to ease into this!), and tinkered around with some ideas for that space. Then I decided to do a little painting to get the feel of the plastered surface.
  This is really big in real life, but not so big compared to the wall. People stopped by the whole time to say hi, offer the use of their adjacent businesses for breaks or storing stuff, offer encouragement and ask questions. Sometimes they would say “That is the biggest mural yet!” I’d have to tell them not to say that outloud or I might get scared. Right now I am just amped up!! See how small today’s work is in comparison with the wall??
 It was really hot working there today! Really really hot! Now that’s incentive to get ‘er dun before summer comes!
Flexible schedule
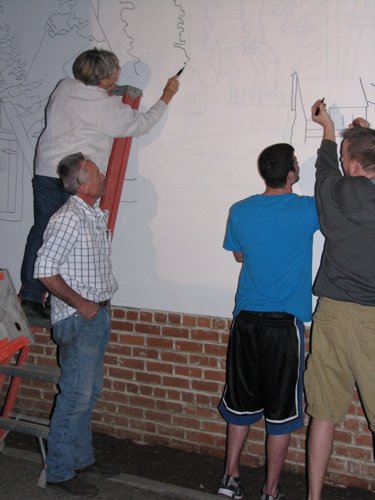
Guess what?? We projected the mural tonight and it is ready to paint!!! Had to, because it is going to rain on Thursday and Friday. Look! There were some tall young men who were very very helpful – Jarson, Joshua (I think that was Mr. Blue Shirt’s name!) and Jared, who is one of my drawing students. That is Mickey securing the ladder with his foot.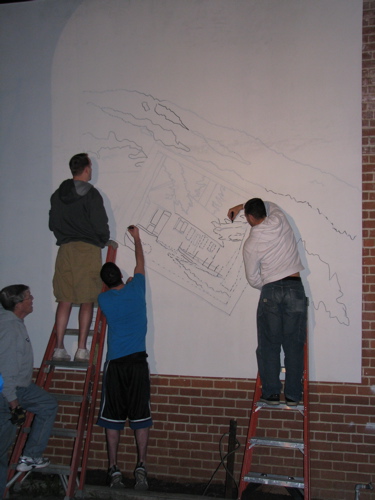 Betsy can draw well – she has been helping me on this project from Day One and got the entire event organized at the last moment today!
 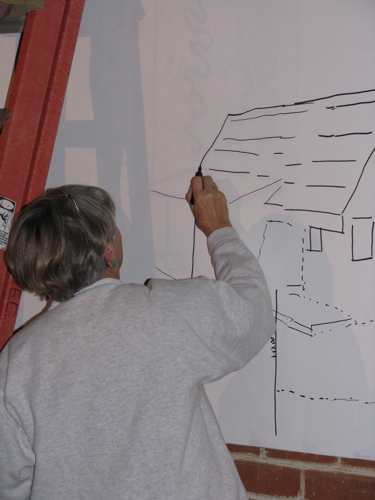 These guys look like clowns, but Bill is the president of the Mural Team who changed his schedule to get ready this evening on a moments notice, and Larry? he pushed the scaffolding along real well!
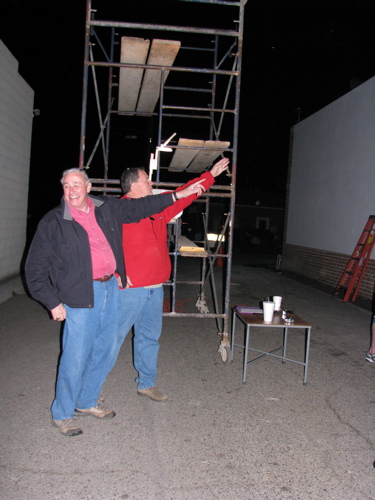 These are the official Mineral King Consultants who made sure everything looked accurate. Good thing they were here and noticed that everything was getting smaller and lower instead of larger and higher! (that projection method has some weak points.)
 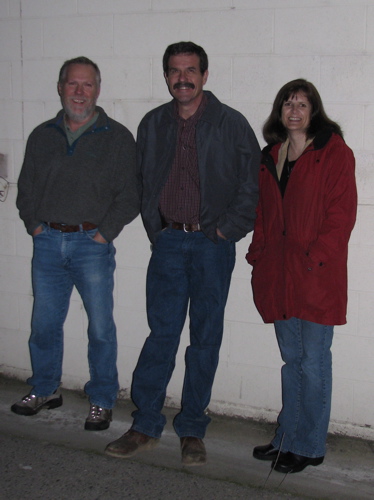 The maquette (model painting) was a great help to correct for projector distortion and verifying accuracy.
 And this is the final panel of the 10 required to cover the entire wall. Unfortunately, there is about 5 feet of wall remaining on the left side, so tomorrow I will be looking through photographs to decide how to fill that space! All that planning and still a bit of a gap – flexible schedule, flexible design!
Marking time
I think this is what it was called in marching band when we just stood in the same place moving our feet up and down but going nowhere! That’s not exactly what I am doing now, but the anticipation is building as I await Thursday night. If it doesn’t rain, we will project the mural outline onto the wall. Meanwhile, I am painting, of course! This will need to be rephotographed when it is dry and not so shiny, so it isn’t on the website for sale yet. However, it is for sale!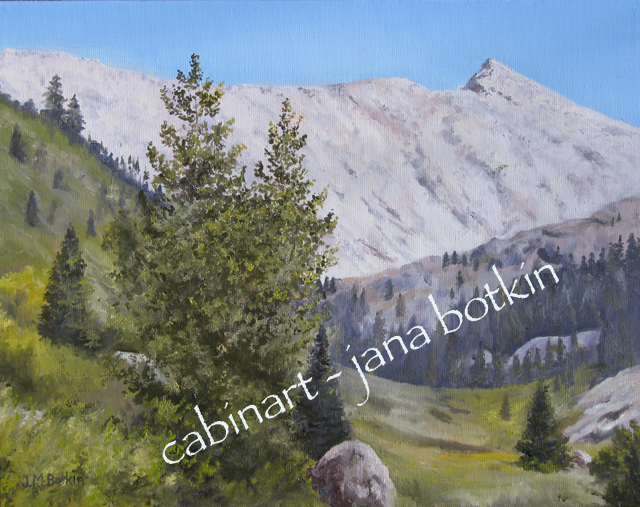 Sawtooth II – oil – 11″x14″ – $154
Diversion
Today I took a day off from my normal Sunday routine and went to Mineral King. Big surprise, that destination, hunh? Anyway, it was very very beautiful. You can see for yourself in these pictures. Besides, I needed to see it in person once more before beginning to paint!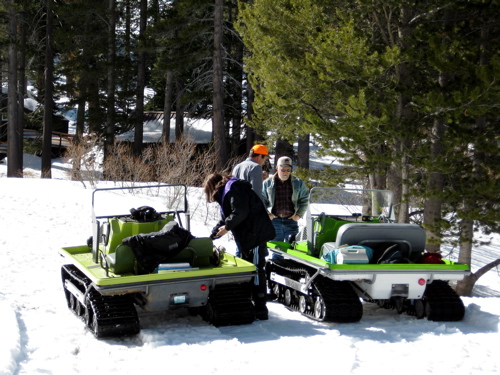 These funny little machines were a great method of transportation over a road that was intermittently snow and bare pavement (we need more snow!!!)
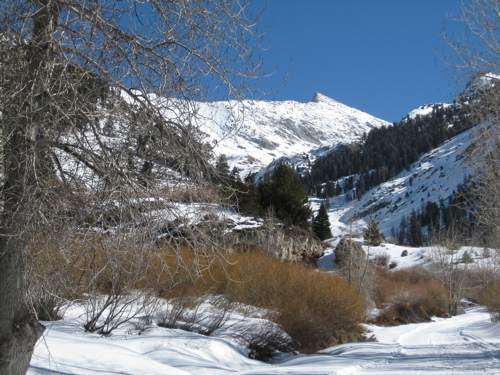 This is Sawtooth, which will appear from a different angle in the mural but remains recognizable.
 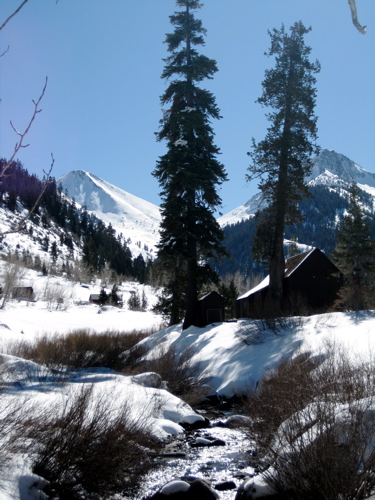 And Farewell Gap is the most photographed site in Mineral King. This is the view from the bridge. The little machines vapor-locked because it was so warm up there today, so I skied over to the cabin while we waited for them to cool down. I had to find an extra pair of sunglasses for our friend. His shades are somewhere down around Redwood Canyon – if you find them next summer, please let me know!